
Framing
-
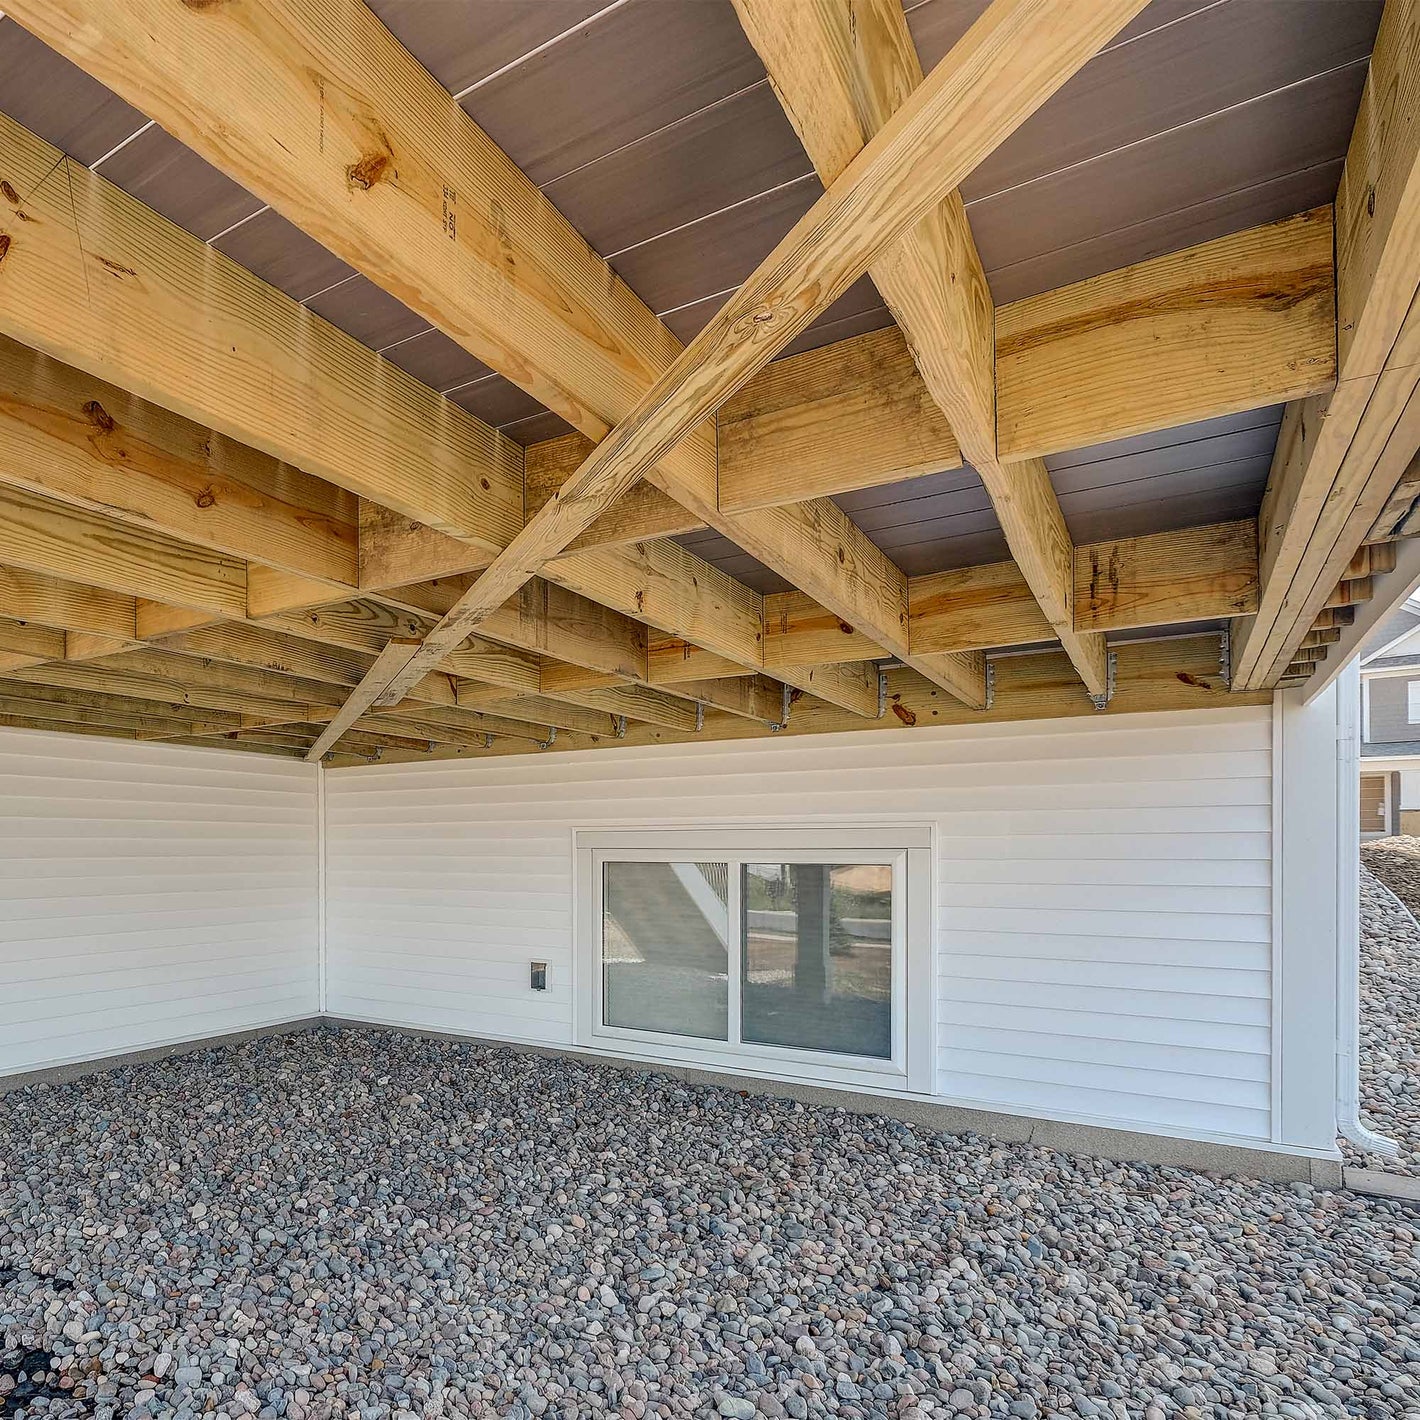
Midspan Blocking
Adding blocking between each joist ties them together, keeping them at the same height and helps with load-sharing. This keeps the deck from flexing or feeling as spongy, especially when PVC and composite decking is used.
-
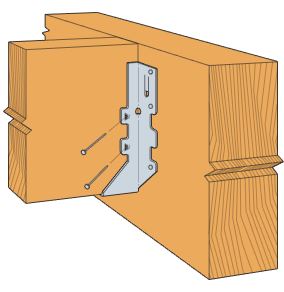
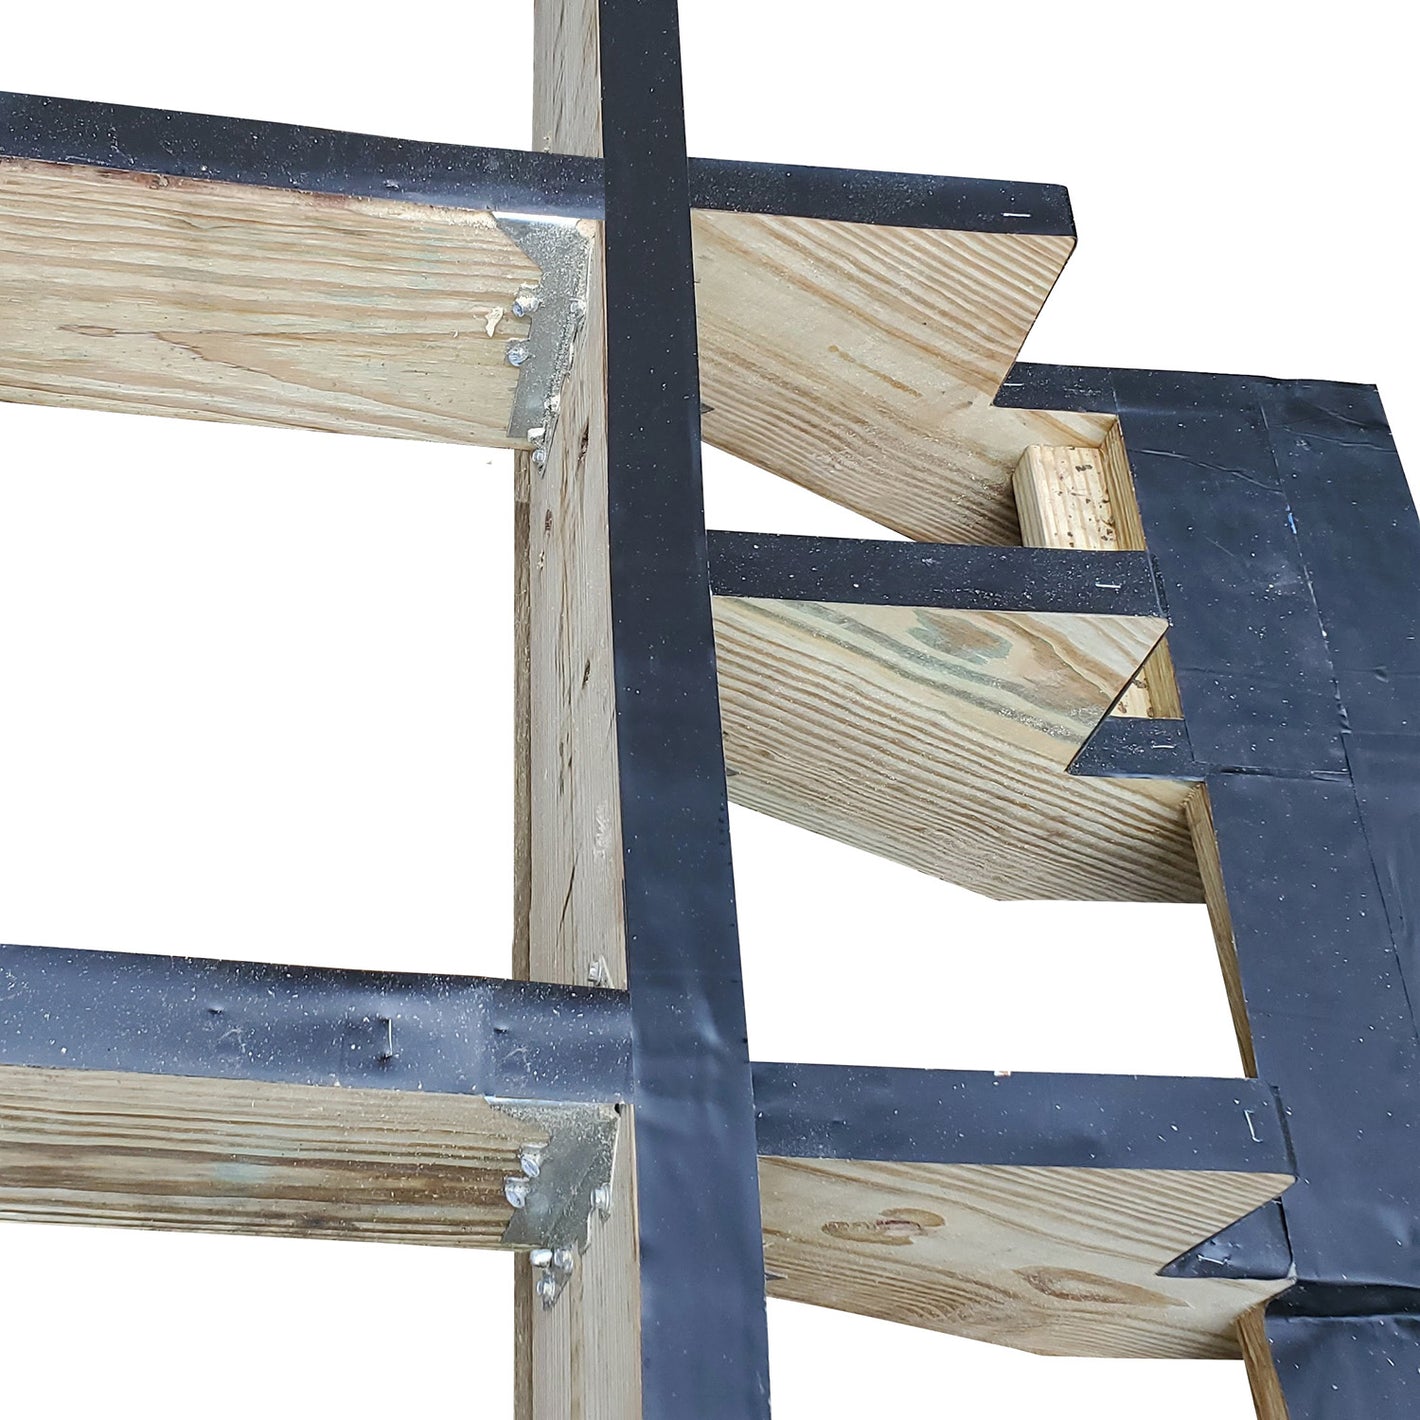
Joist Hangers
Joist hangers should be secured to the ledger or beam with 1-1/2" hanger nails or SD screws. Once joists are in, angled 3" nails should be inserted at an angle so they hit both the joist and the ledger or beam. The angled nails connect the joist to the ledger securely, while the hanger supports it from the underside.
-
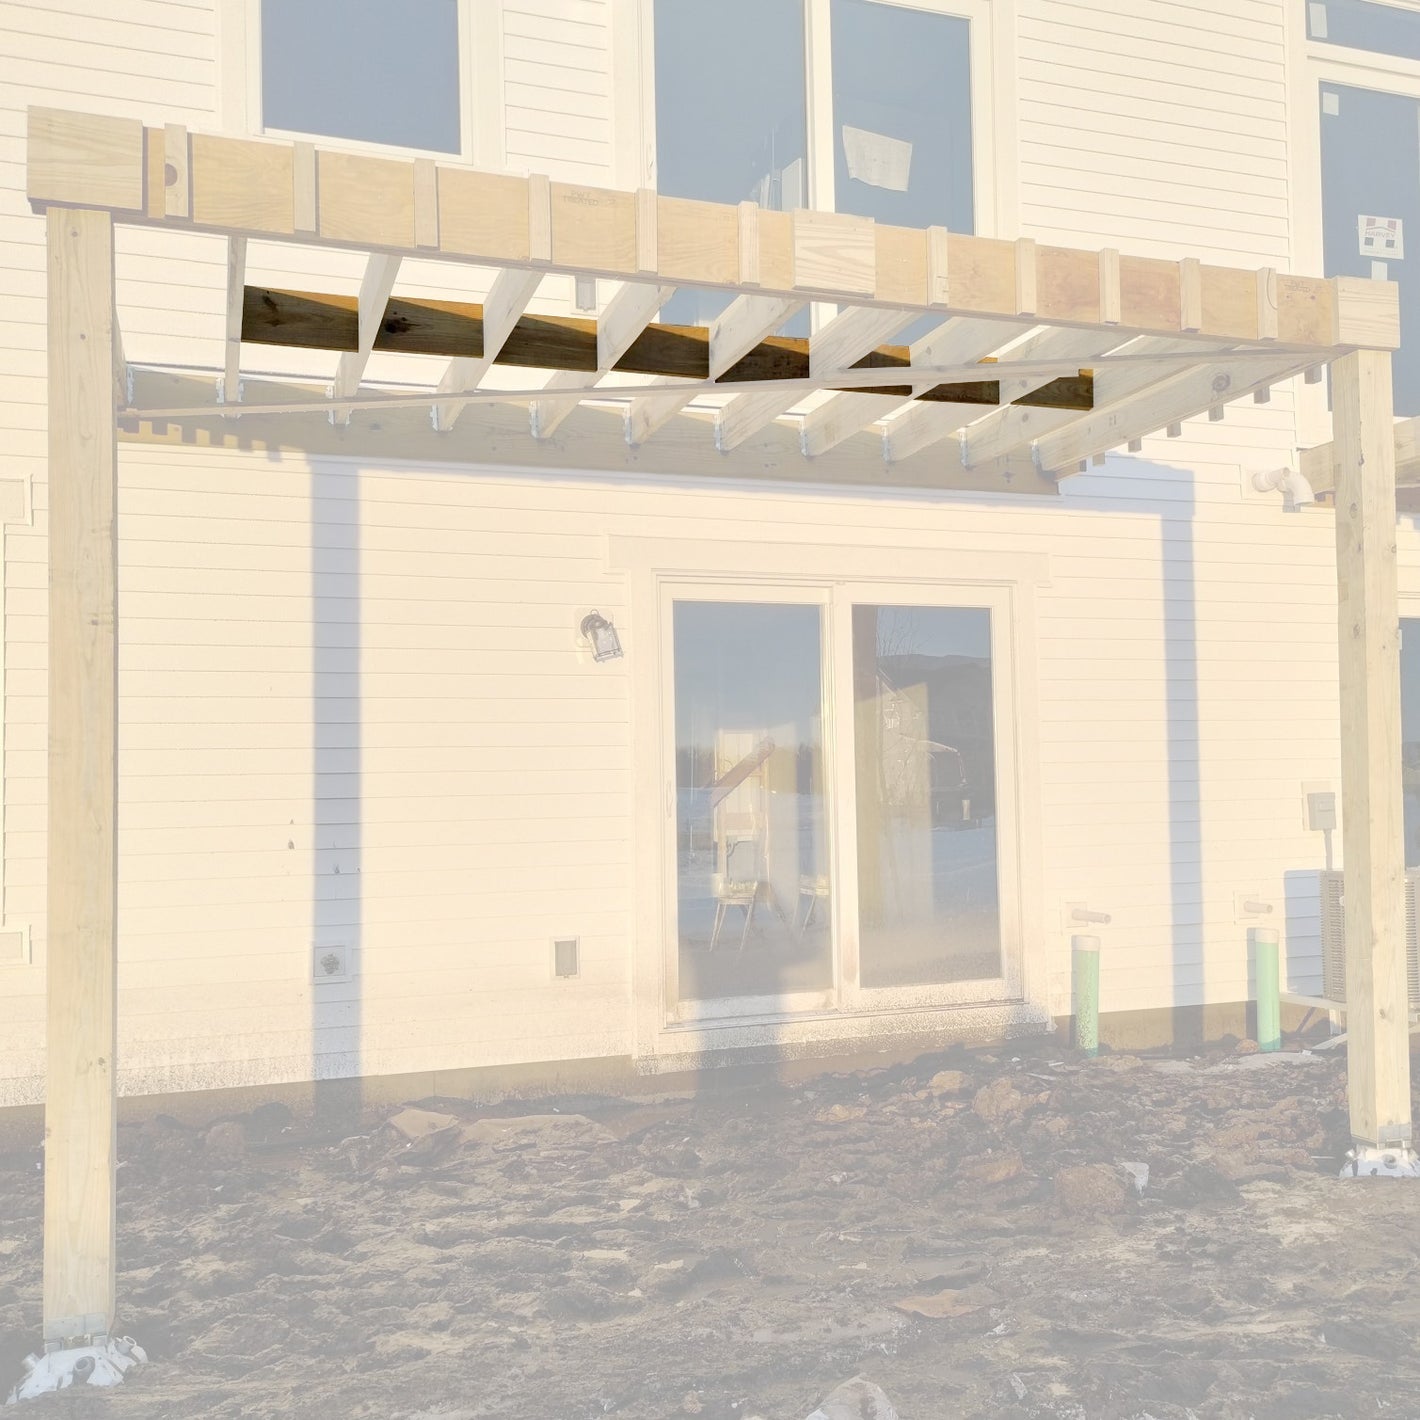
Sway Bracing
Once your deck frame is squared up, treated 1x4s should be fastened to the underside of the deck, stretching from one corner to the opposite corner. Nails or construction screws can be used to secure them, as long as they penetrate into the joist an inch or two. This keeps the deck square and helps keep it from swaying in the wind or from sudden lateral movements.
-
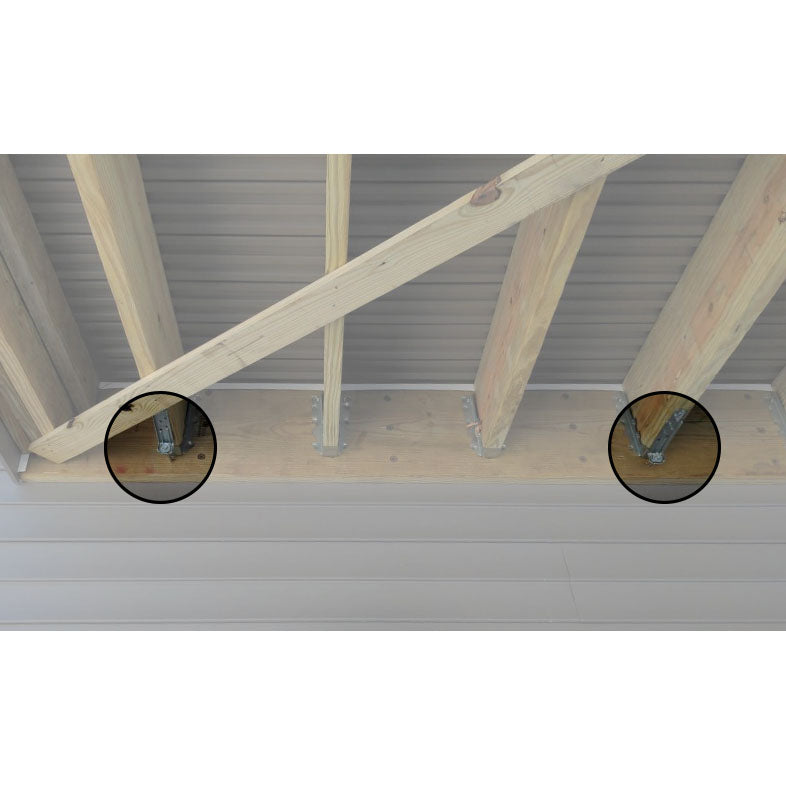
Deck Tension Ties
Adding these ties is often required by code, so that the deck stays secured to the home in case of a ledger failure. If a deck is built correctly, these are a somewhat redundant piece of hardware, but are usually needed to pass inspection.
-
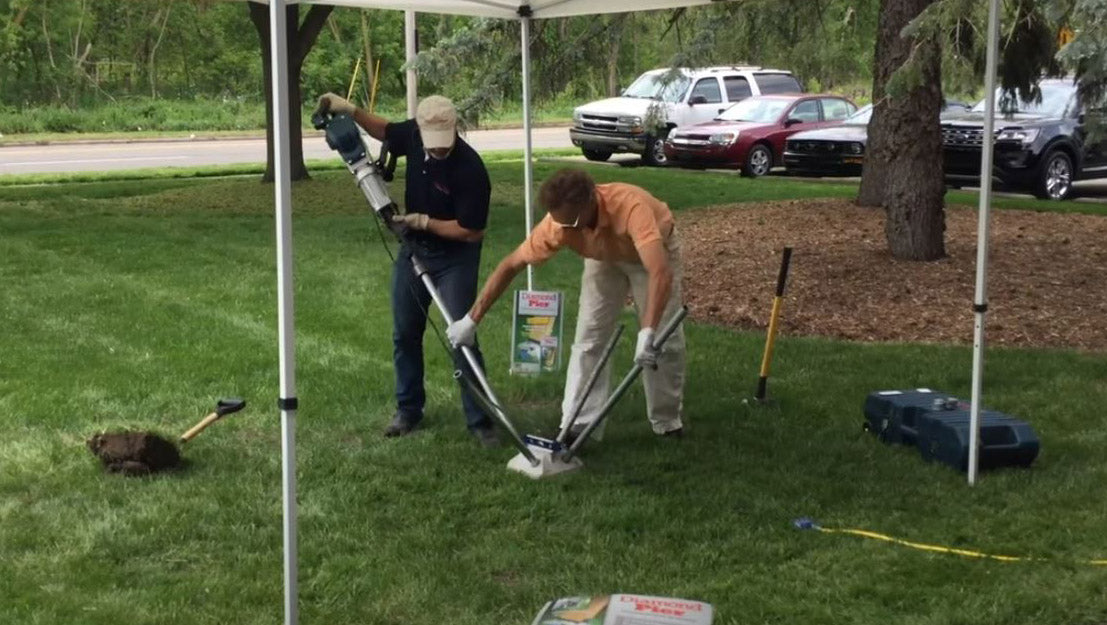
Diamond Piers
Read MoreIf you don't like digging or want easier inspections, Diamond Piers are a great foundation option that is approved in nearly every state and in most cities. They're installed with a jackhammer and special bit, which you can get from a tool rental place for about $100 with the Diamond Pier bit.
-
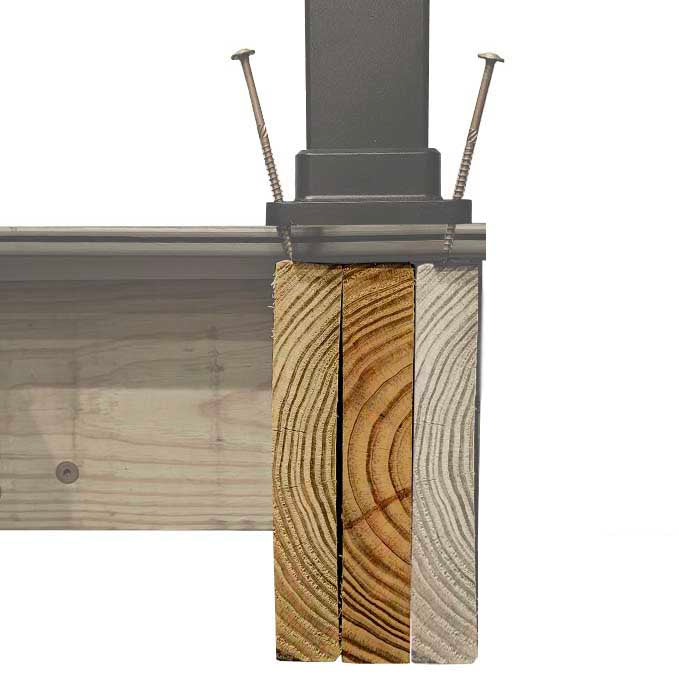
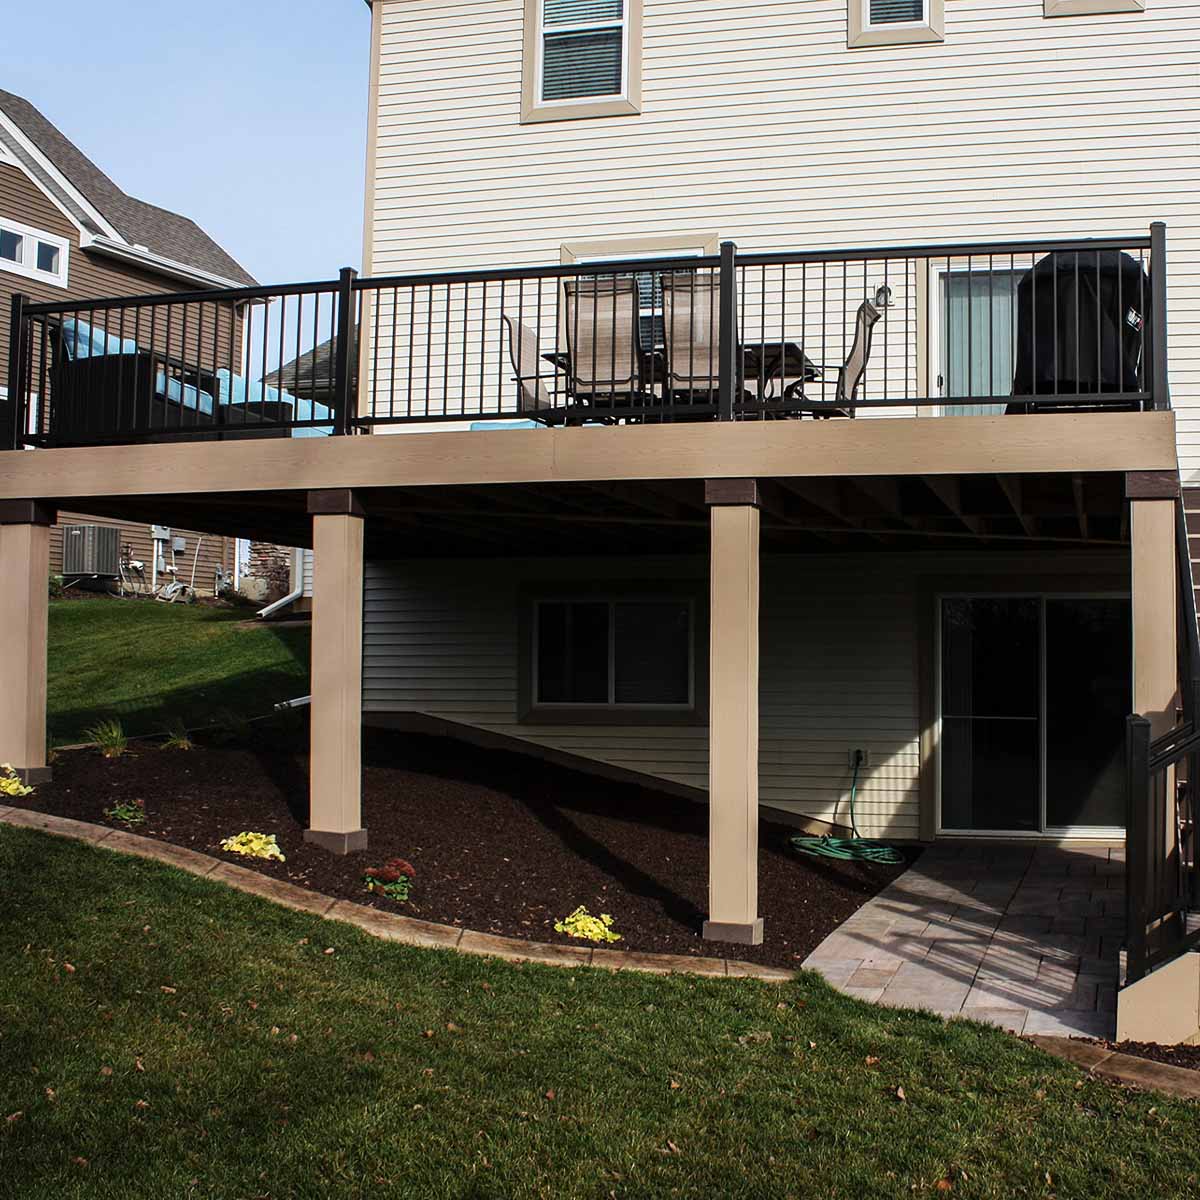
Post Blocking
Read MoreIf your deck is close to the ground and your post blocking will be inside the rim, you'll need to get them in place and mark their locations before the decking is laid out. Each post should have at least 3 layers of framing beneath it for all screws on your rail post to have framing to screw into.


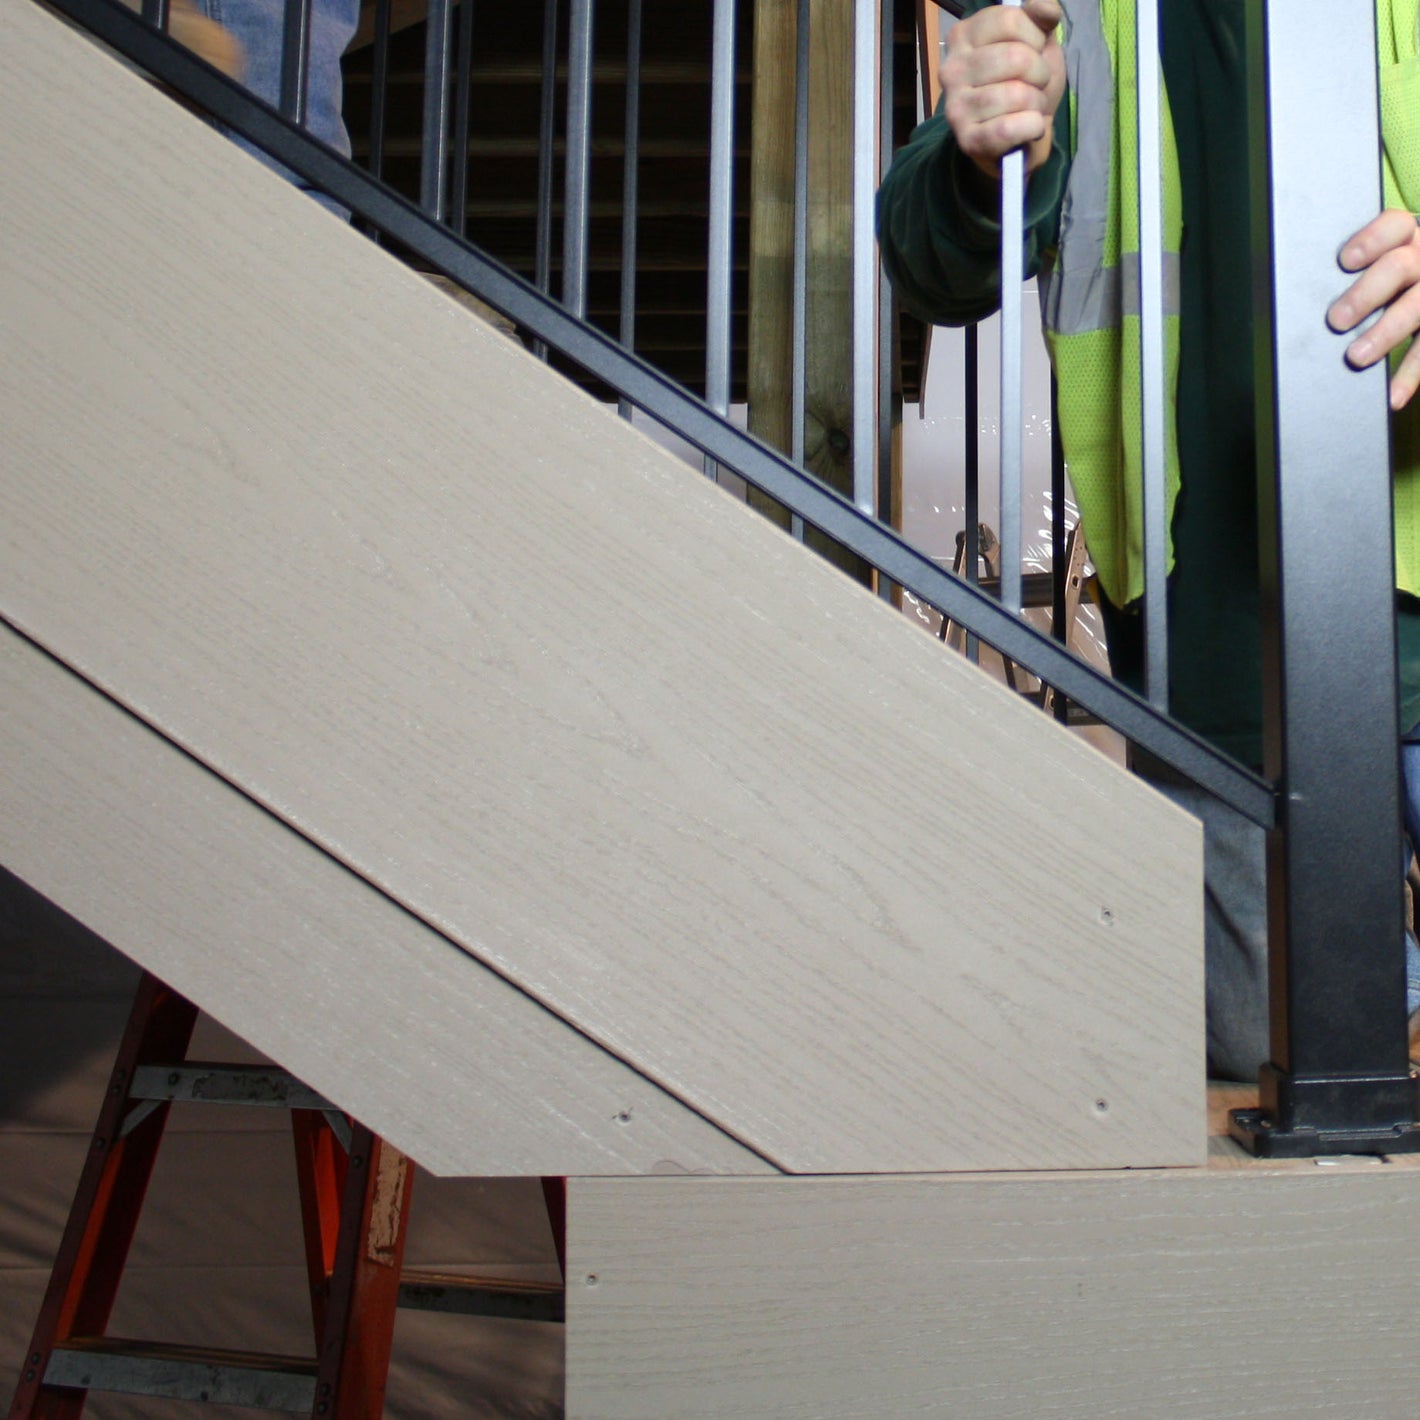
Stairs
-
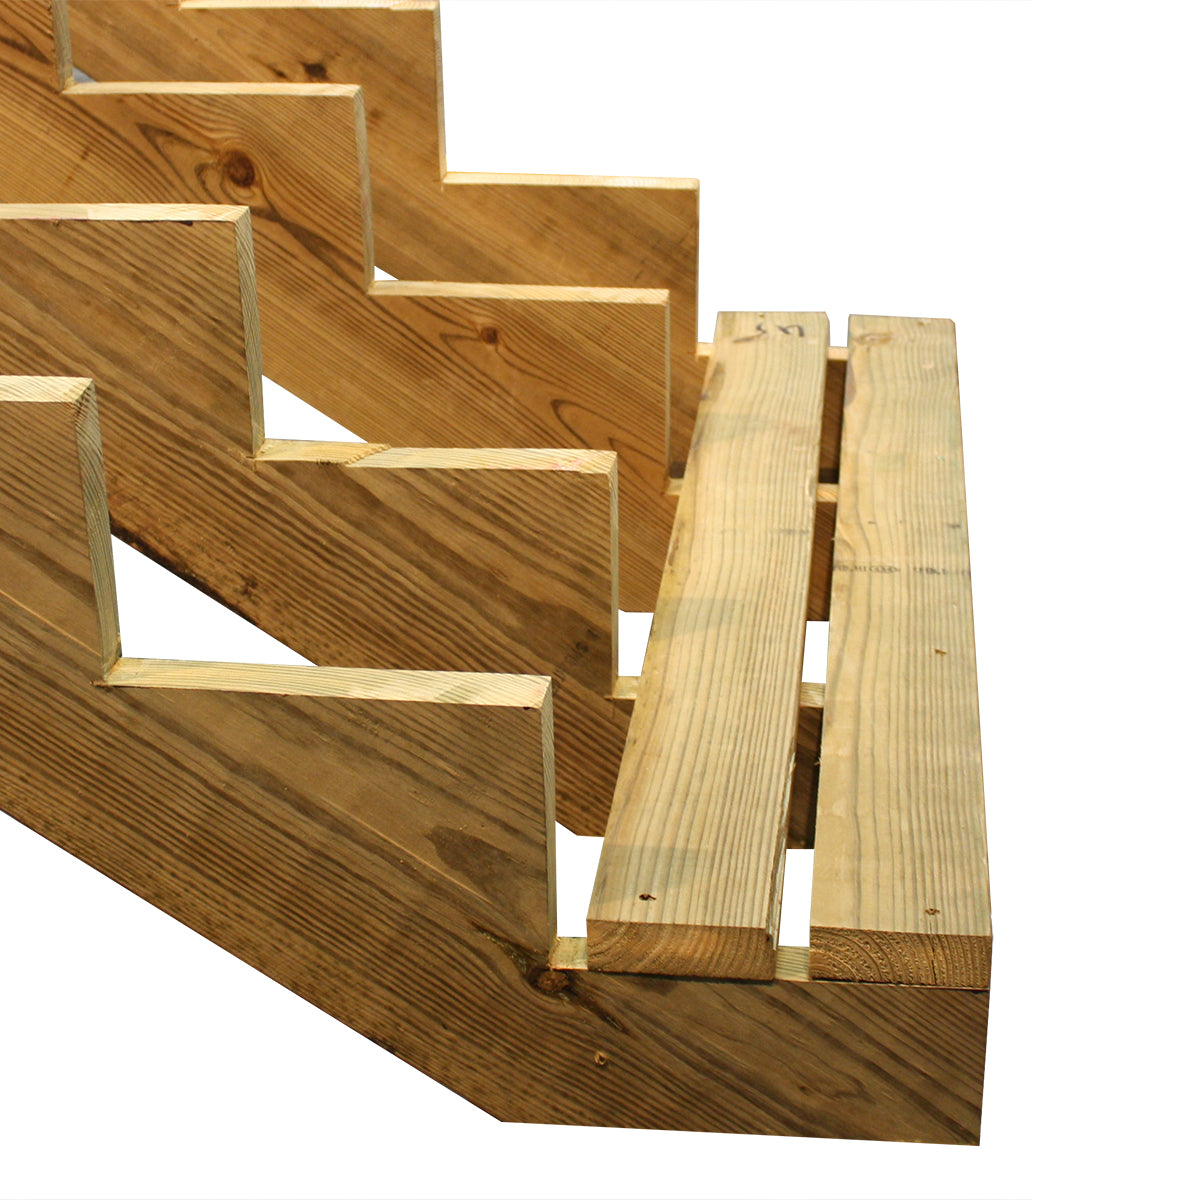
Subtreads
Using subtreads is a great way to eliminate stringer splitting, labor-intensive stringer blocking, and adding stringer stability. Just rip a 2x10 in half and screw each half to the stringer, spaced with the gap below the tread gap. Be sure to drop your stringer by 1-1/2" and cut an extra 1-1/2" off the bottom.
-
Joist Tape
Joist tape is especially helpful on stair stringers because of all the exposed end grain. Covering the end grain of every cut edge ensures that the extra-absorbent end grain doesn't soak up water and rot.
-
Optimizing 12" fascia
When only 12" fascia is available in your preferred color, you can use the leftover 4" rip from stair risers to cover the bottom few inches of the stringer. If an 8" height riser is available and your are closing the ends of the stringers, stack two riser boards to cover the stair stringers.


Decking
-
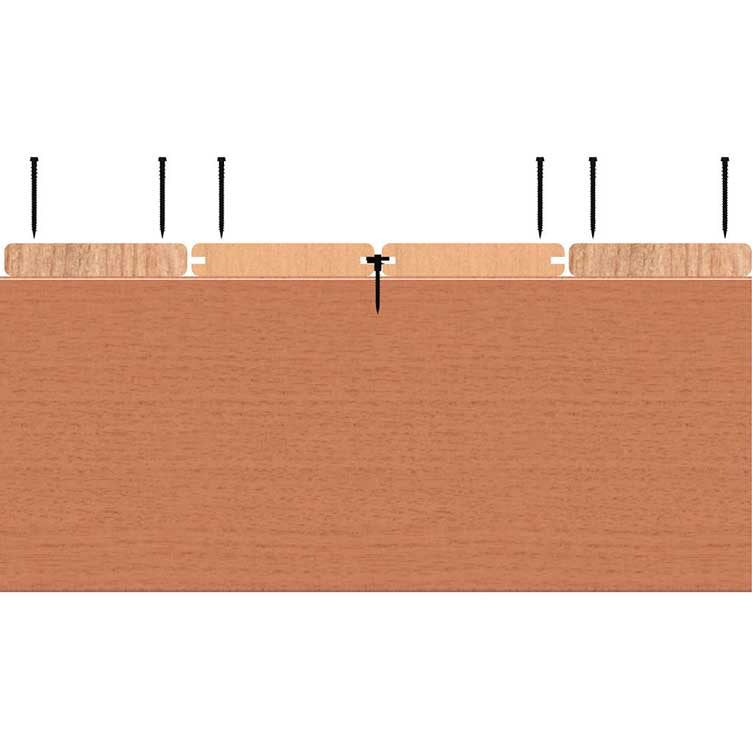
Trimming Board Ends
Decking is cut slightly long at the factory, and not always a perpendicular cut, so each end should be cut or at least checked for squareness before fastening it.
One common practice is to screw boards to the framing then trimming them, which prevents boards from having mismatched or staggered ends on not-totally-square decks.
-
Use Screws For First and Last Boards
Read MoreHidden fasteners won't work next to non-grooved boards, or at the house wall. If there is one side of a grooved board that can't use a clip, fasten it with a normal screw Cortex/Pro-plug fasteners
-
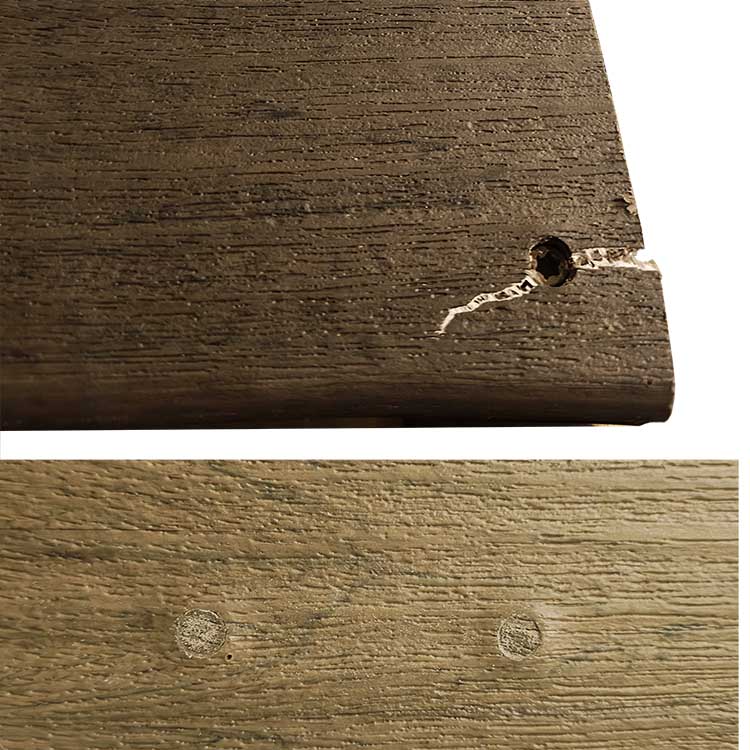
Pre-Drill Cortex and Pro Plug screw holes
This ensures that the denser composite material is the right size, not mushroomed around the screw head, and so the screws at the ends of the boards don't crack.
Standard color-matched decking screws should also be pre-drilled when they're 3" or less from the board end.
-
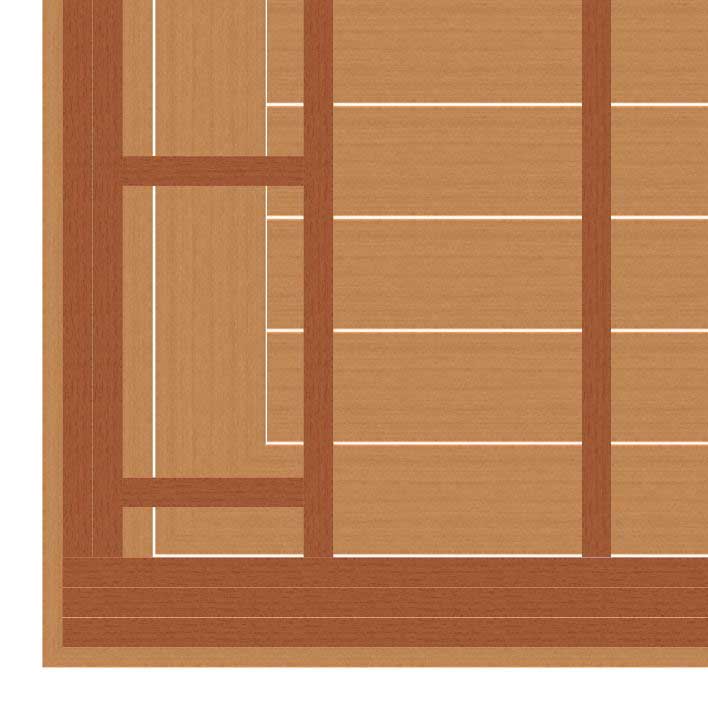
Border Blocking
Read MoreSide border boards should be balanced atop a double rim, or supported by blocking every 16" in the last joist bay. Field boards should have the edge of a joist no less than 1-1/2" from the end. Be sure to plan your joist locations spaced to allow for this.


Fascia
-
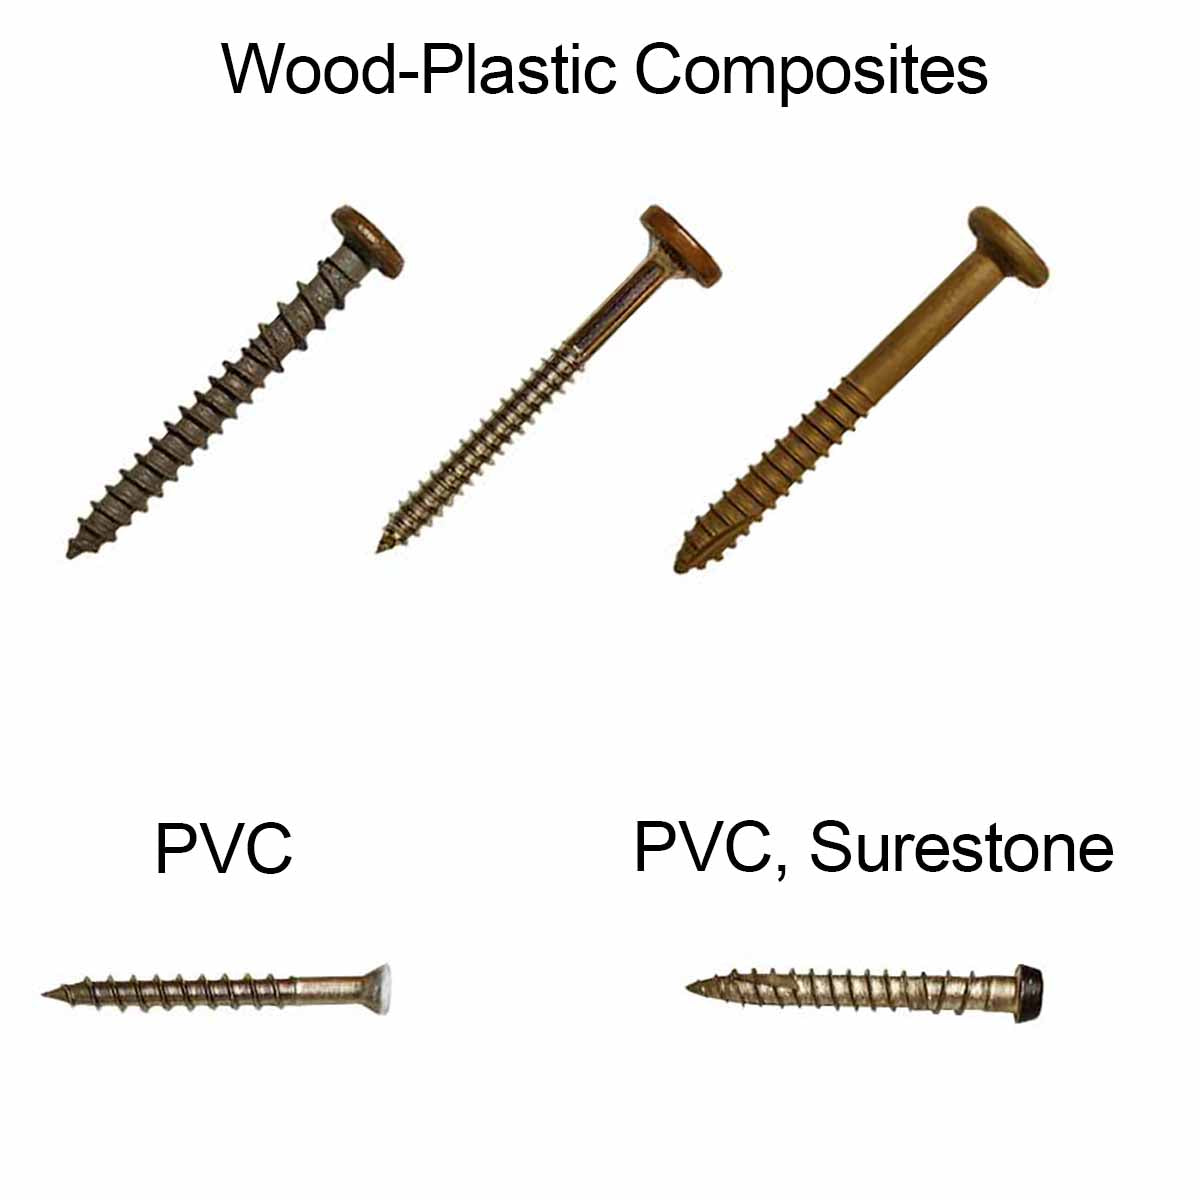
Using The Correct Fasteners
Read MoreFascia and riser material needs fasteners designed for fascia, unless it's Azek 3/4" riser material. Any screws going into dense WPC material should have the holes pre-drilled.
-
Seam Locations
Fascia usually comes in 12' lengths, and you may want to be strategic about where your seams are located. For example, if your deck is 20' wide, you may want the seam right in the middle. You'd have to order two 12' pieces and cut 2 feet off both pieces and use the 10 footers.
-
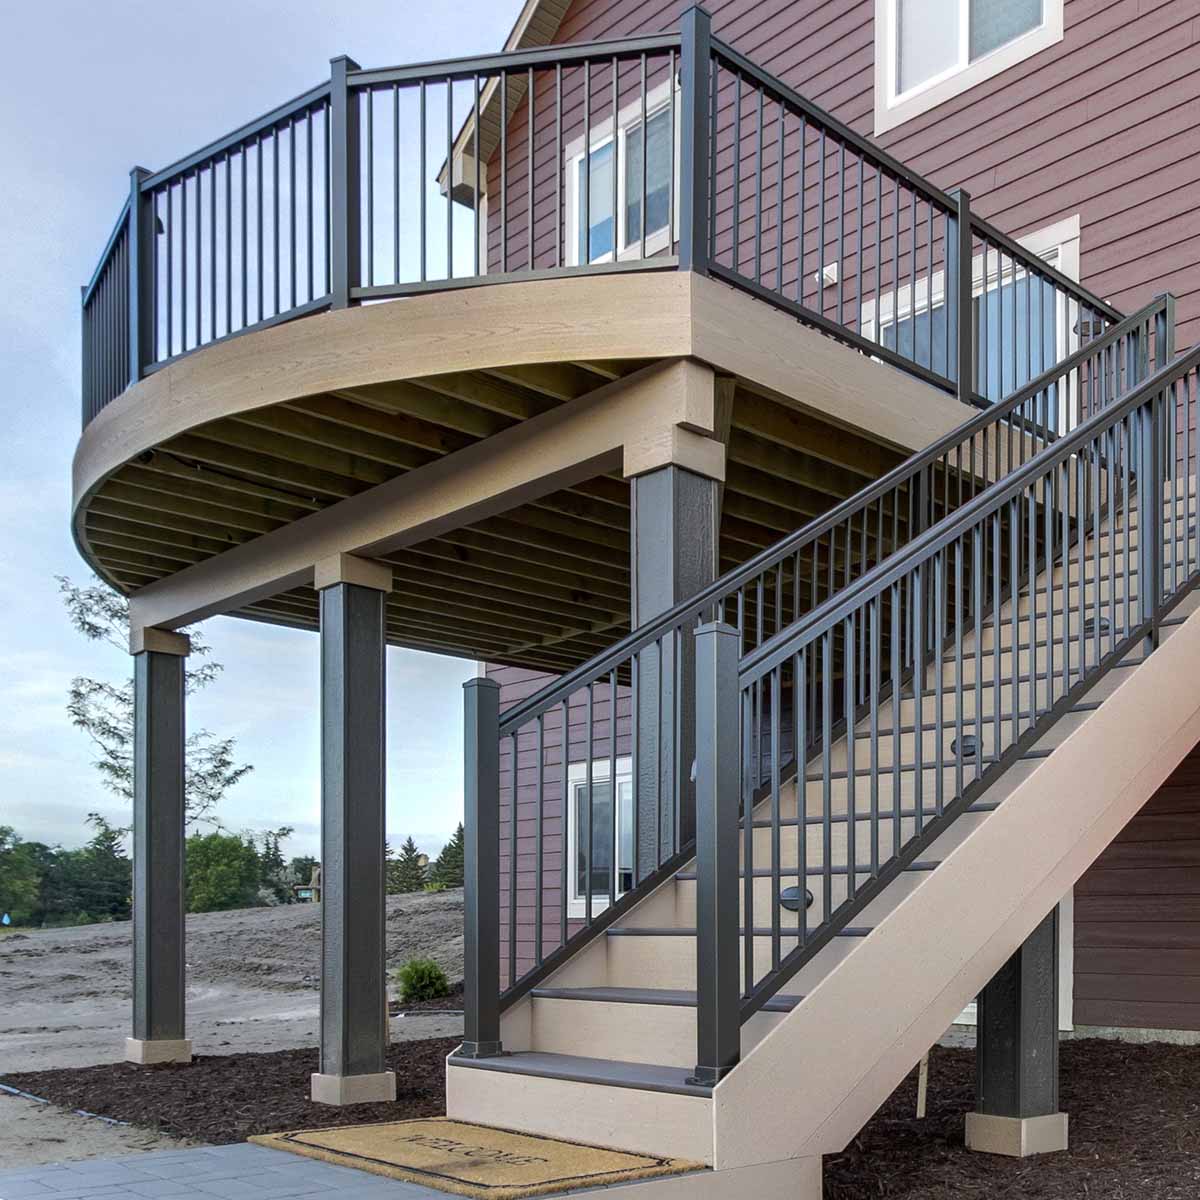
Fascia For Drop Beam
Don't forget, if you have a dropped beam or posts, you may want to cover them in fascia for a cleaner look.


Railing
-
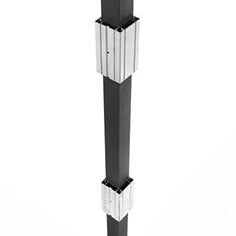
Using Sleeved Posts
Wood railing posts are usually not used with metal railing panels, and can be complicated to frame around.
When working with composite rail systems, we recommend using a structural surface-mount post to replace the 4x4s, and make framing and installation simpler.
-
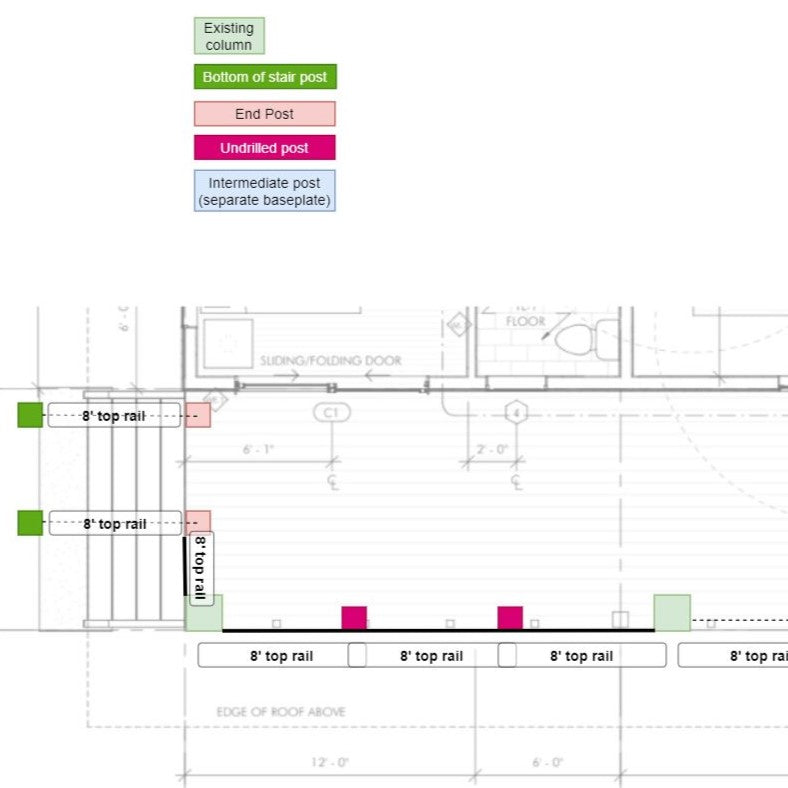
Post Spacing and Panel Lengths
Although you probably figured out what panel lengths you need when you were estimating your deck, you'll want to make sure you use them in the places you planned on. It may be helpful to lay out your posts and panels on your deck to make sure everything is correct and accounted for.
-
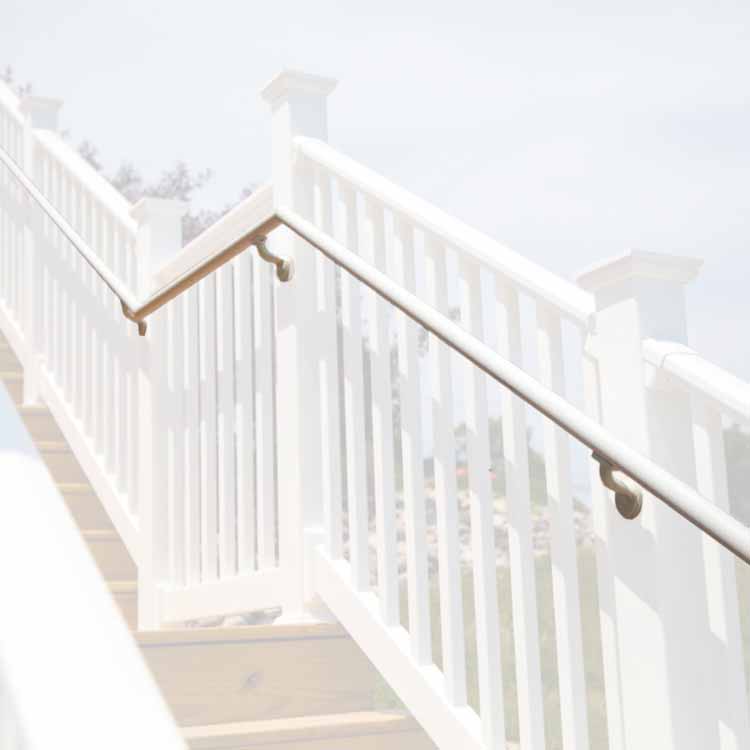
Graspable Handrail
If your deck is tall enough to need a rail, any stairs you have will need a "continuous graspable handrail" to pass inspection. Most aluminum railings are available with a continuous crossover handrail that meets these specifications. If you're working with composite rail or other unique rails, the top rail will not meet these requirements. Graspable handrail rods are the solution to this, and can easily be mounted after the fact.


More Tips
-

Working With Ultralox Rail Cover Snaps
Ultralox and Impressions Express panels have hidden brackets inside the top and bottom rails that are covered by a top or bottom snap. Top snaps can be difficult to remove...
Working With Ultralox Rail Cover Snaps
Ultralox and Impressions Express panels have hidden brackets inside the top and bottom rails that are covered by a top or bottom snap. Top snaps can be difficult to remove...
-
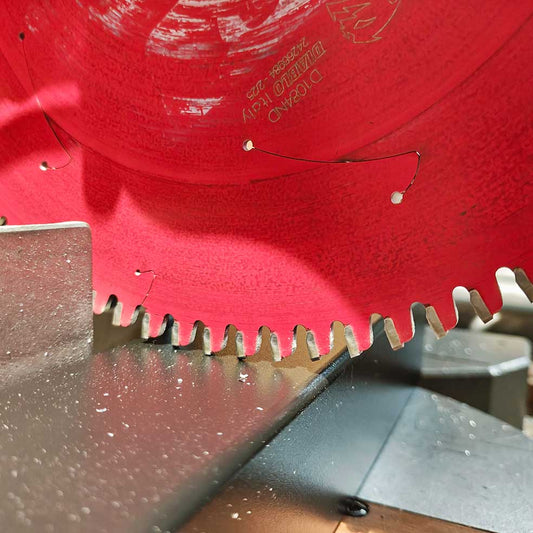
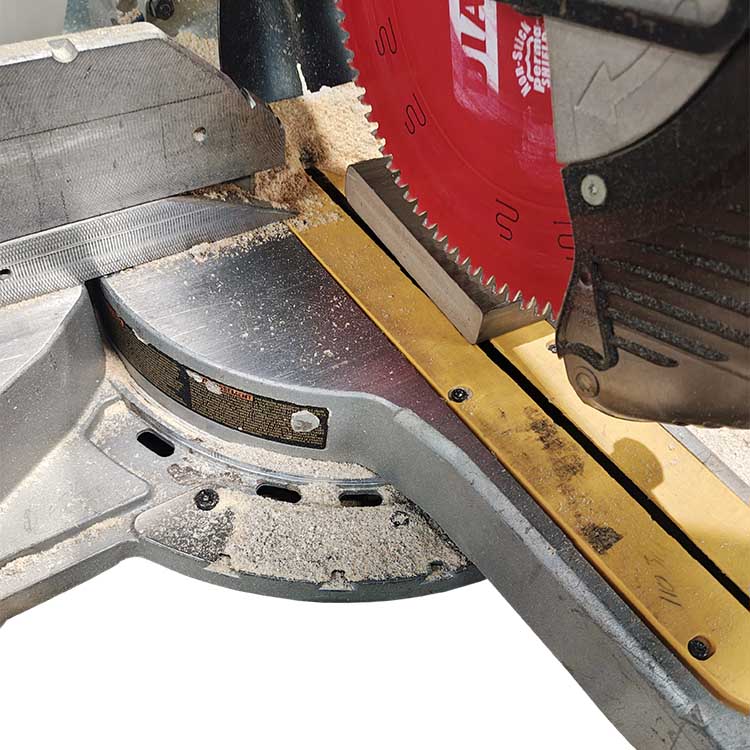
Cutting Aluminum Railing
Cutting aluminum with a miter saw and nonferrous blade is the best method for getting a clean, straight cut. An angle grinder fiber chop saw wheel may work, but it...
Cutting Aluminum Railing
Cutting aluminum with a miter saw and nonferrous blade is the best method for getting a clean, straight cut. An angle grinder fiber chop saw wheel may work, but it...
-
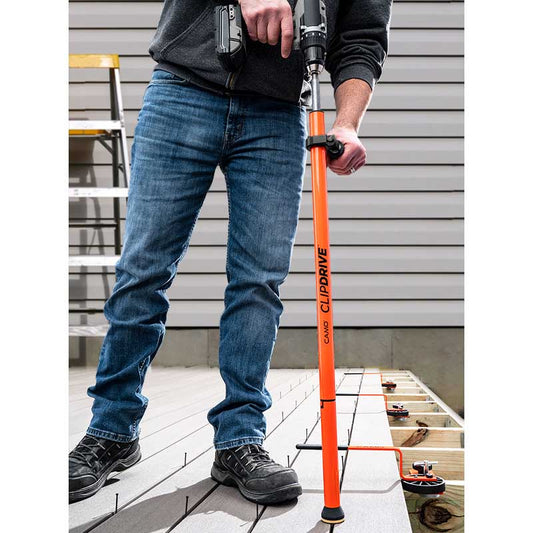
Tools For Building Efficiently
You may be a contractor hoping to save money by saving time, or a homeowner hoping to save your back and knees, there are a few tools that can make...
Tools For Building Efficiently
You may be a contractor hoping to save money by saving time, or a homeowner hoping to save your back and knees, there are a few tools that can make...


