
The strength of a stringer comes from its "spine", which is the bottom few inches of the stringer that isn't notched out. Completely supporting this spine correctly is essential to make sure the top and bottom steps don't break off with the grain.
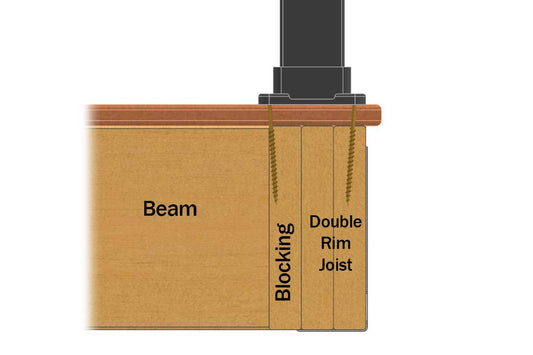
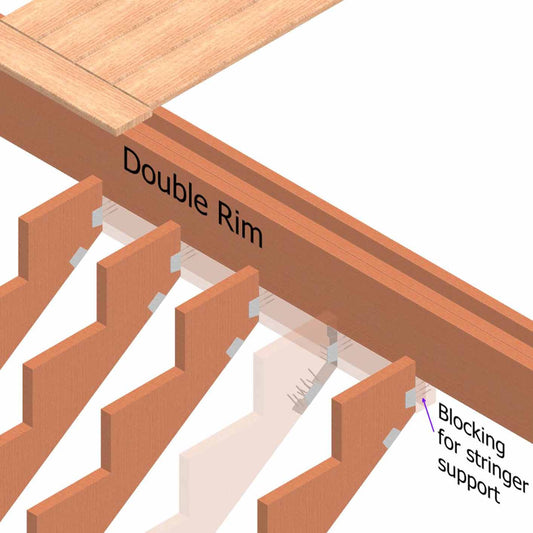
In nearly all applications for stairs, the stringers will only partially rest against the deck rim, so additional blocking will need to be added to the underside of the rim to fully support it. These blocks can easily be secured with 8" lag screws up through the underside of board into the rim, pre-drilling to prevent splitting and make sure the screws are centered.
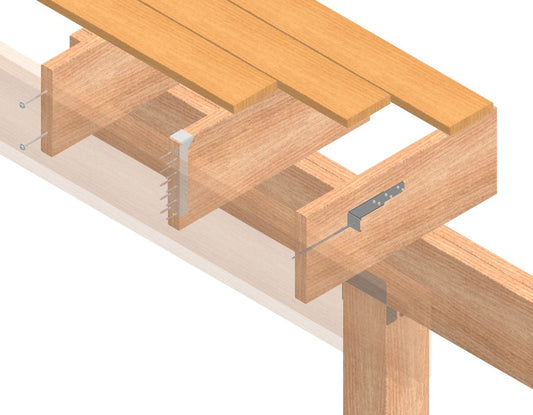
 The block-and-nail method is the simplest method of connecting stringers, and only requires 2x blocking pieces and 3" nails. The blocks between the stringers keep the stringers from twisting, and provide extra framing for nails to secure to. They should be nailed to the deck frame with the top edge flush with the stringer's top step edge.
 Using a Simpson LSCZ strap bent around the underside of the stringer is an easy way to connect stringers with a connector. They are adjustable to any angle of stair.
Bend the strap in the middle, and hold up the stringer with the strap in place, and mark where the top of the strap will go. Nail the strap to the deck framing with 3" nails, and once in place the stringer can be set onto the strap. Nail the strap to the stringer using 1-1/2" nails through the side, and 3" nails up into the underside of the stringer. If nailing the strap to the right side of the stringer, install the first stringer on the left side of the stair. This leaves enough room to swing your hammer. If you're using a palm nailer, order won't matter as much since your working space is much smaller.