
What Makes Decks Different
Building a deck is especially satisfying because often when your last screw is in, it's done! No final painting, sanding, taping, or sealing. It's also an exterior project with weatherproofed materials, meaning certain accommodations will be needed to ensure the deck will still be relatively strong after being out in the elements for a few decades.
Handling
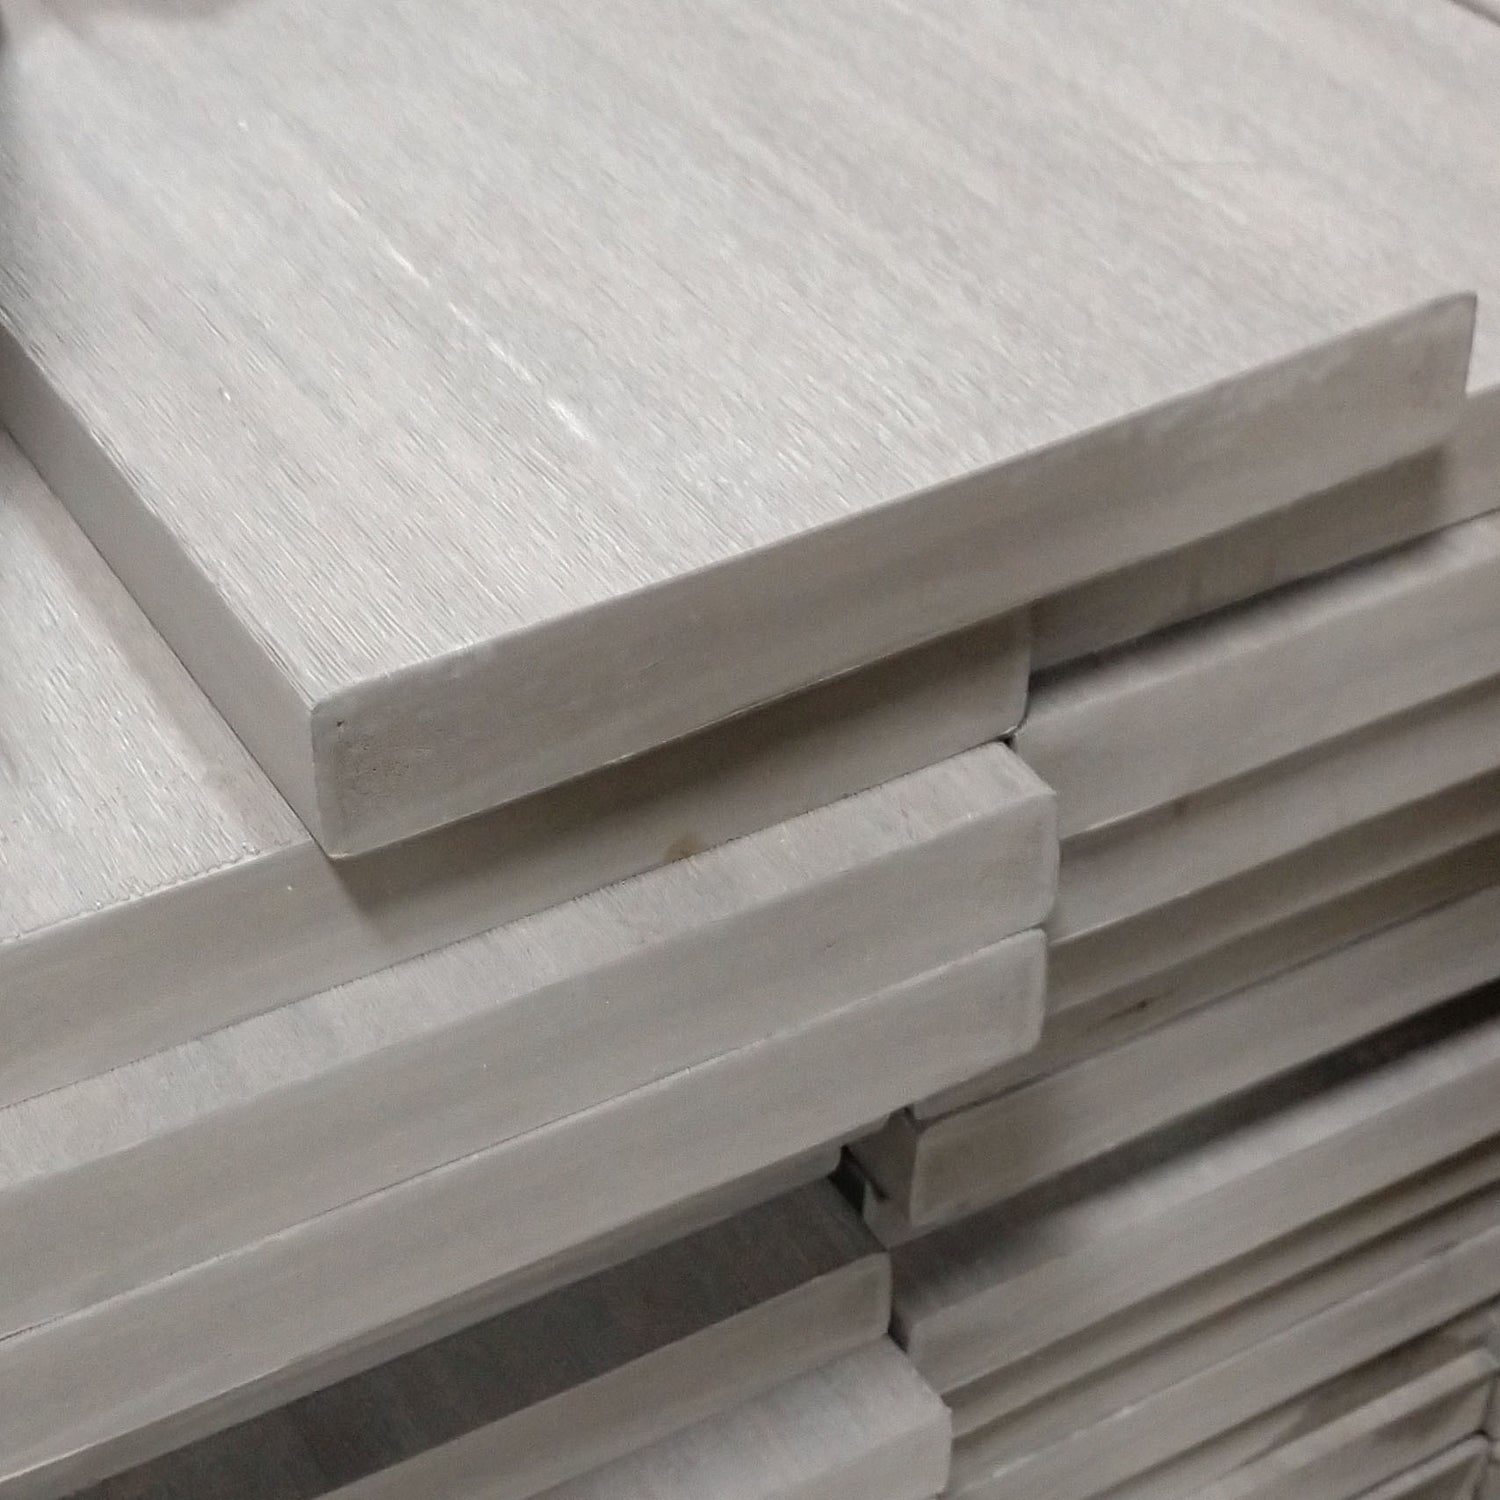
Materials Ship "Pre-finished"
When you're unpacking your deck load, you are handling a finished product. Composite boards and railing panels won't need finishing, sanding, or sealing. They are ready to be used as soon as they're cut and screwed on, so handle them with care! Decking and railing can scratch, and should not be handled like studs or bundles of shingles.
Handling
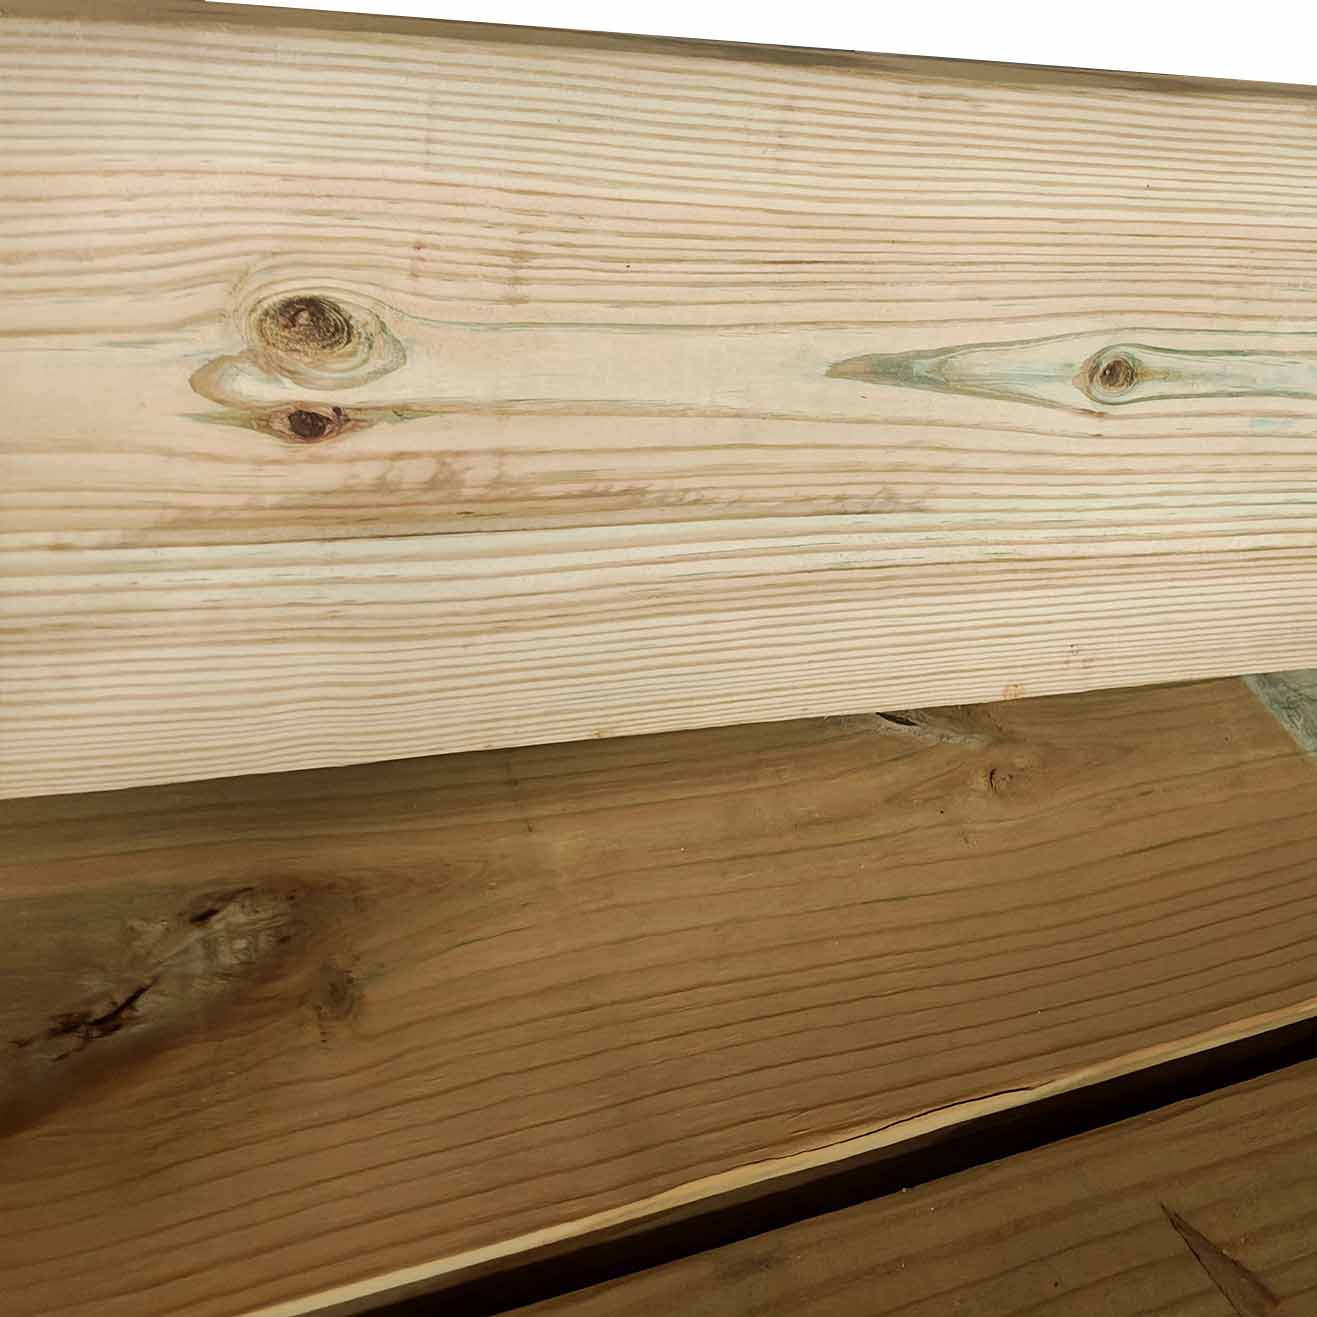
Treated Lumber
Wood framing can be handled pretty roughly, but there are things to remember. Wet treated wood will dry out, and it's best if it dries out after installation. This ensures that you're working with straight lumber, and it won't warp the same after installation since it's securely braced and fastened.
Construction
Waterproofing
Deck ledgers are one of the few structural areas on a home where its waterproofness directly affects the structural integrity of the deck. Leaking and rotting around a ledger will cause the screws to pull out, and with enough movement and weight on the deck, the ledger can fall off the house.
Construction
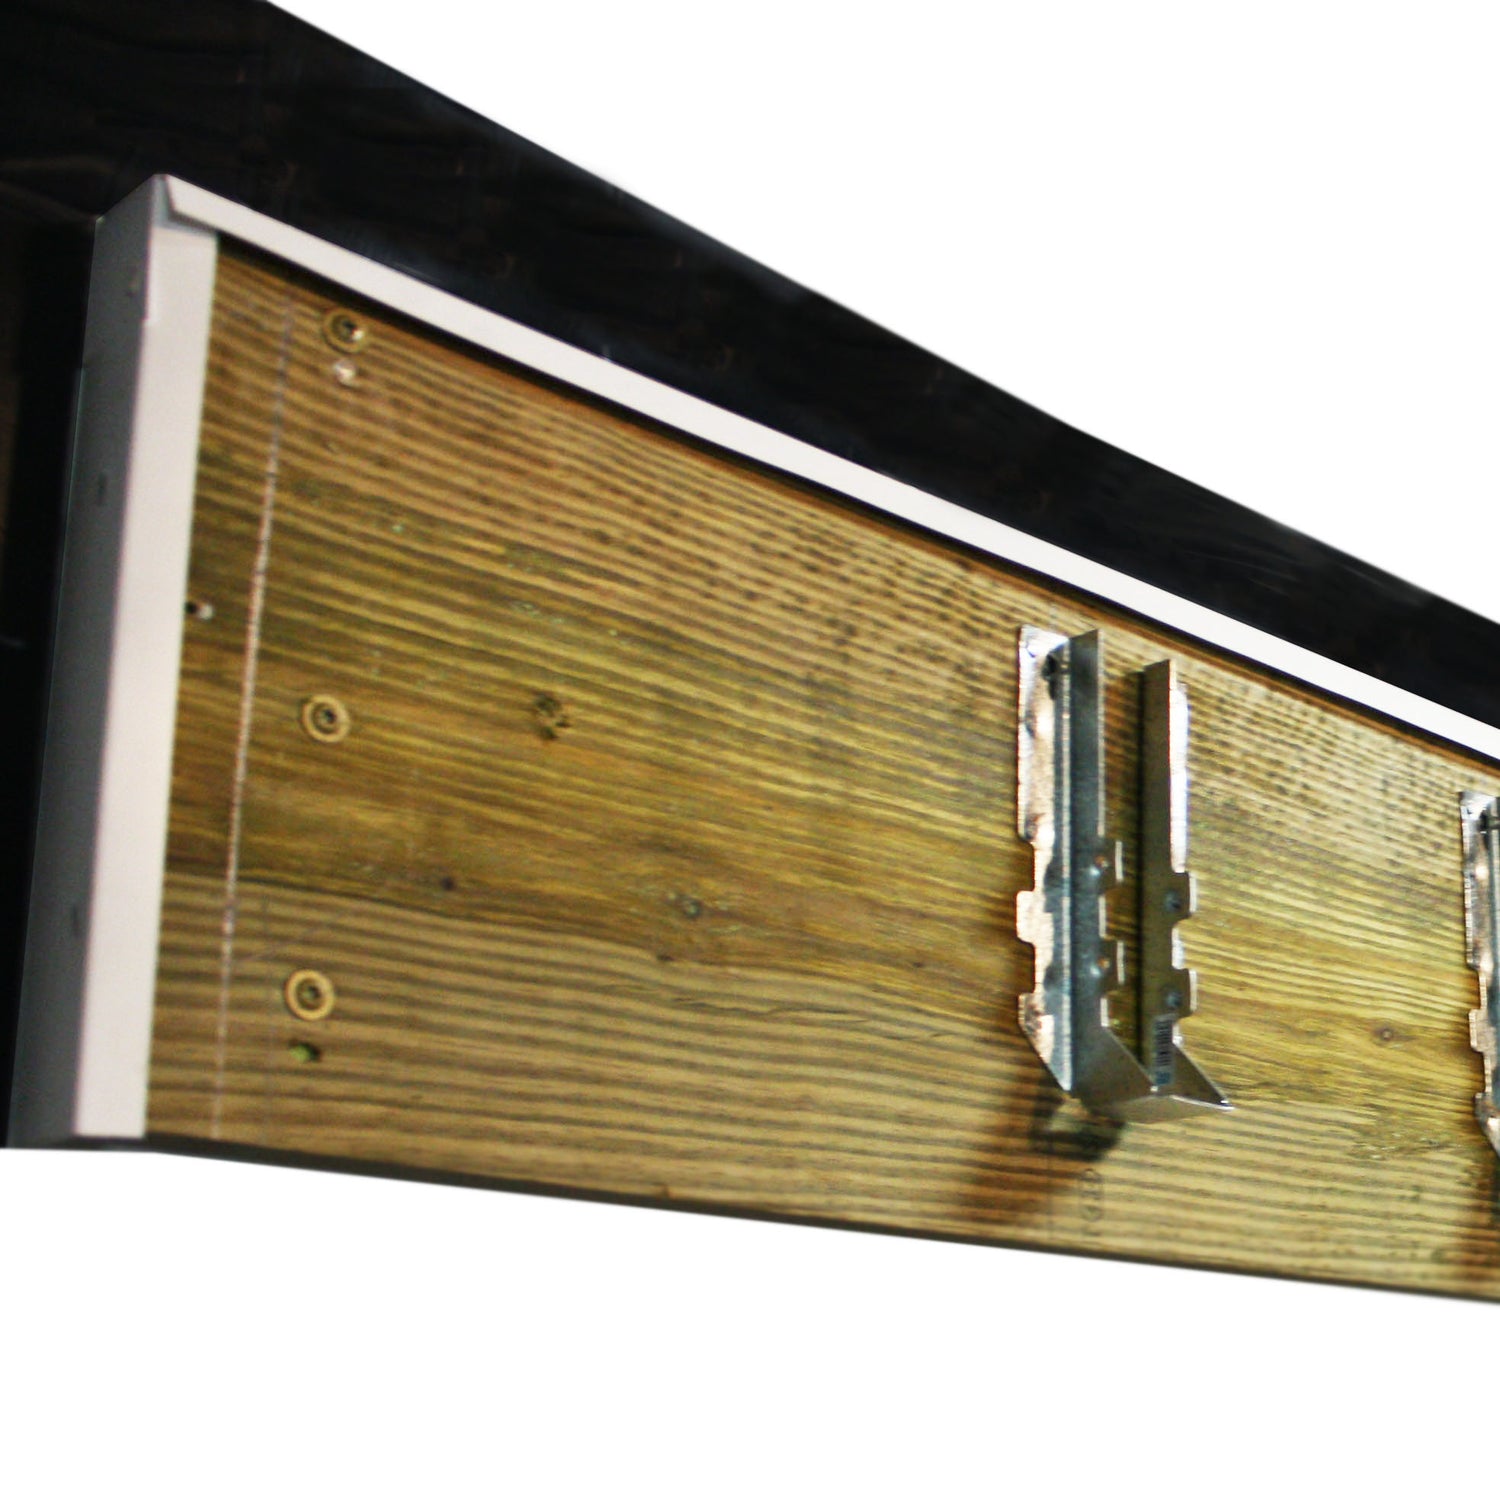
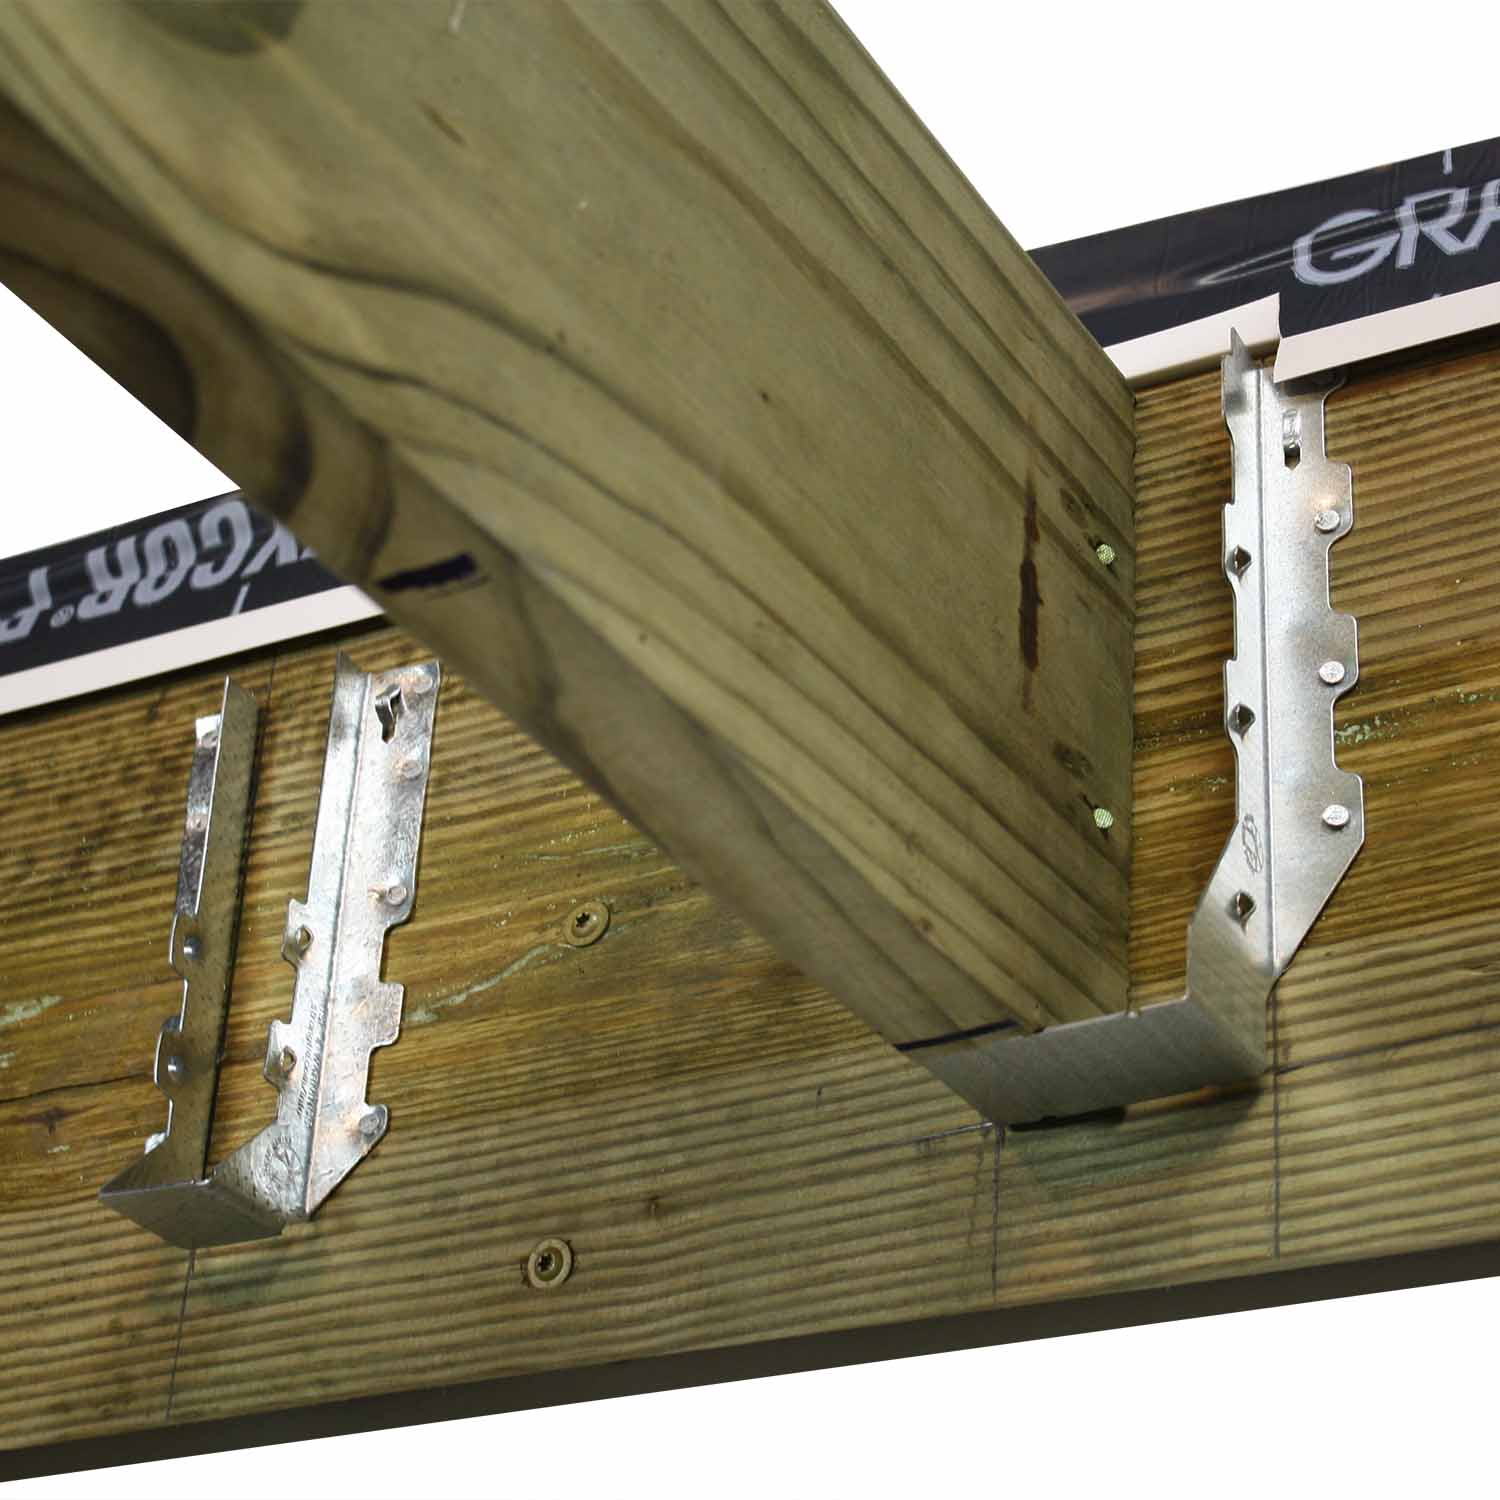
Connectors
Because deck framing is subject to weathering, humidity changes, and movement from wind, connection points need more than a few nails to hold them in place. Joists should either rest on a drop beam, or in a joist hanger. Beams need a saddle where they rest on the posts for stability. Each stringer needs a connector where it meets the deck in case of stringer end grain rot. If you're just toenailing your framing together, there is potential for the fastener to pull out, especially after it has weathered and even rotted for several years.
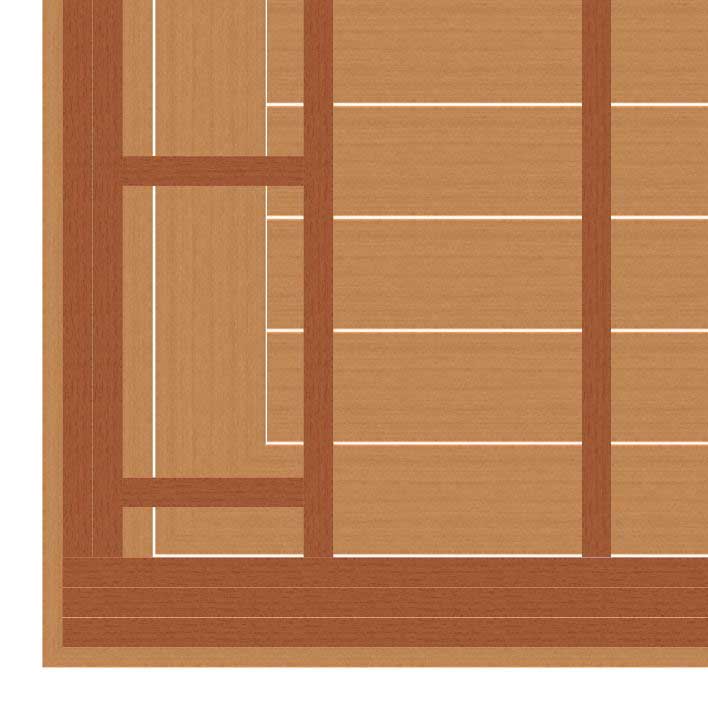
Construction
Joist Spacing
It's not hard to space joists 16" on center, but ensuring that they are located to support your border and field board ends is crucial. For single borders, the joist bay between your last joist and double rim should be between 1" and 3". For double borders, the last joist bay should be between 7" and 9", and blocking should be spaced evenly down the entire bay.
Construction
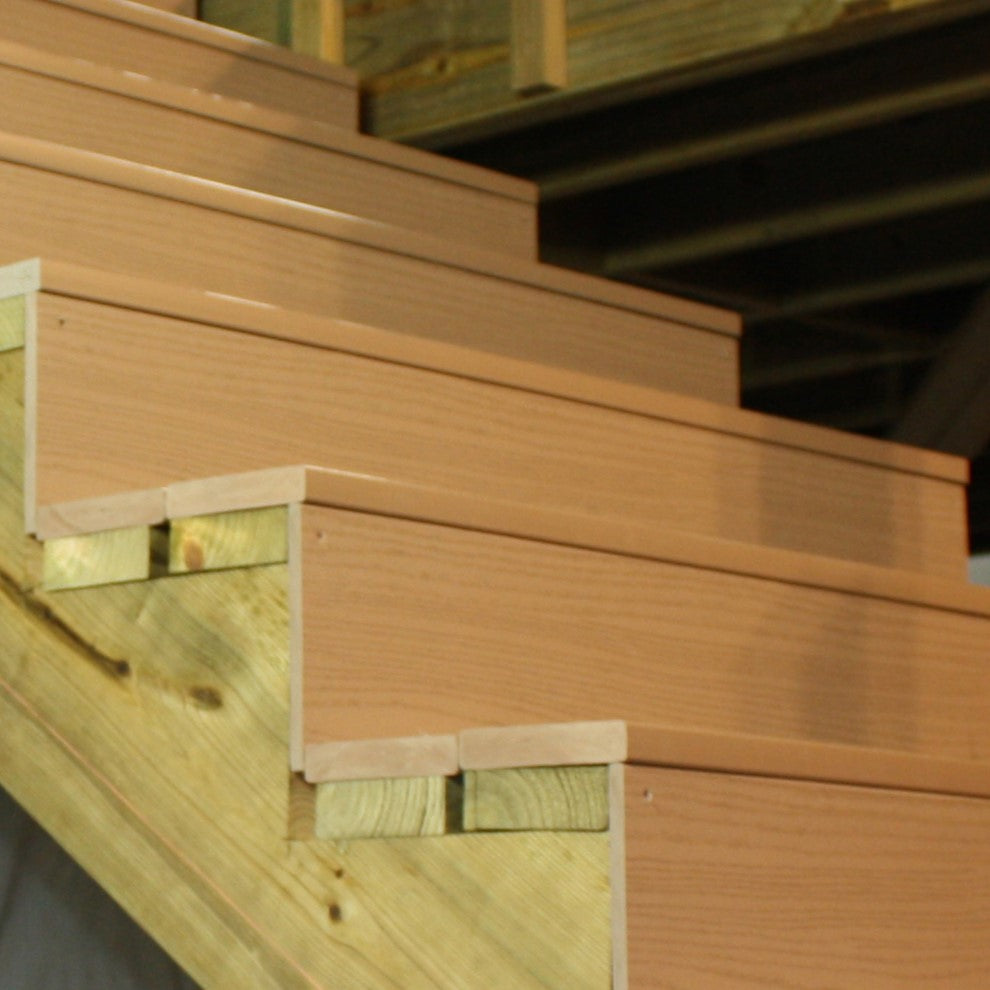
Stair Stringers
Unlike an interior stairway, deck stairs don't have a wall on either side to enclose the side openings, and the sides should be covered with fascia. If you choose to picture-frame each step, you will need to cut out your fascia to match the stringer's profile, both of these features will be labor-intensive. If you want less work and need to ensure code compliance, an uncut fascia board on the side will cover the end openings and cover your end cuts.
Stringers will only be connected to the deck at the top, and should use special connectors to secure them.
Construction
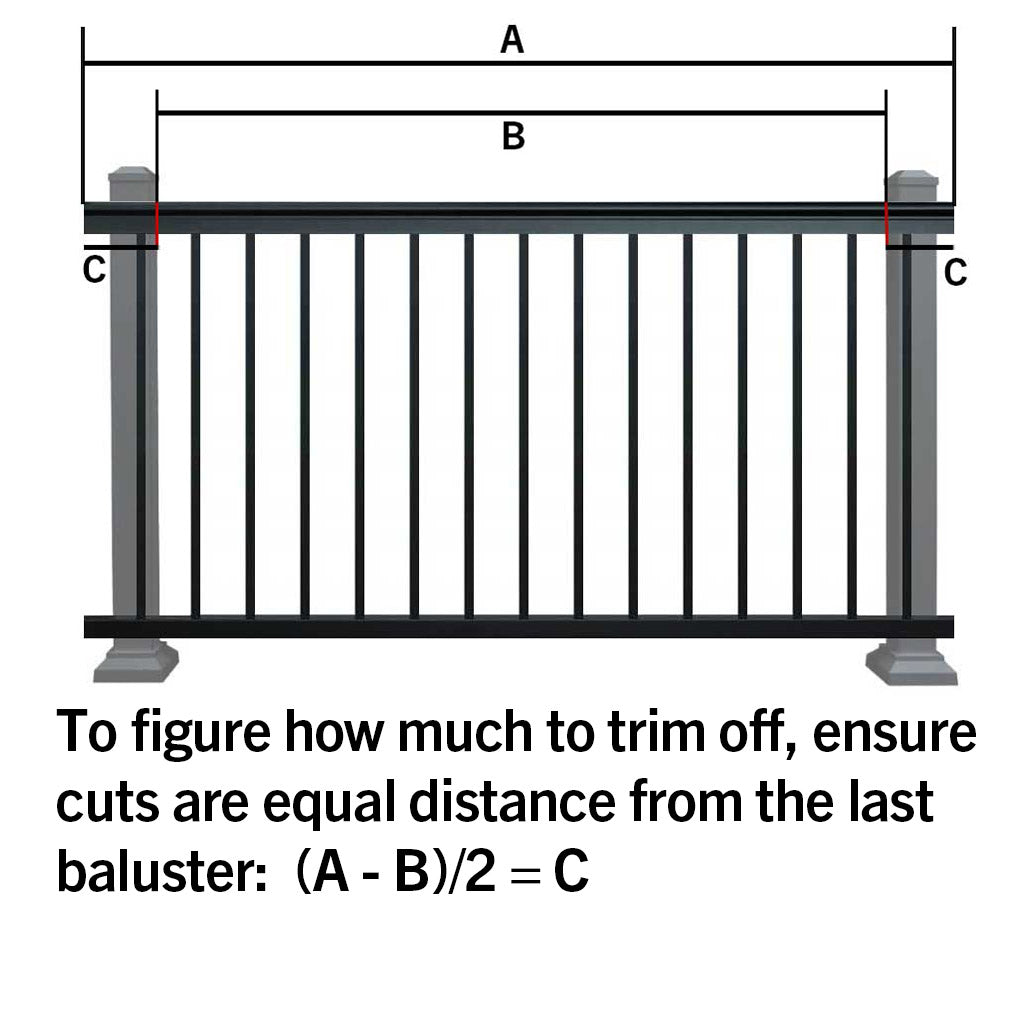
Railing Panel Spacing
Posts should be spaced equal distances apart, making every panel the same size. This means trimming all the panels, rather than just the last panel. Subtract the space between the posts from panel length and divide by 2 to figure out how much to trim off both ends of the panel.
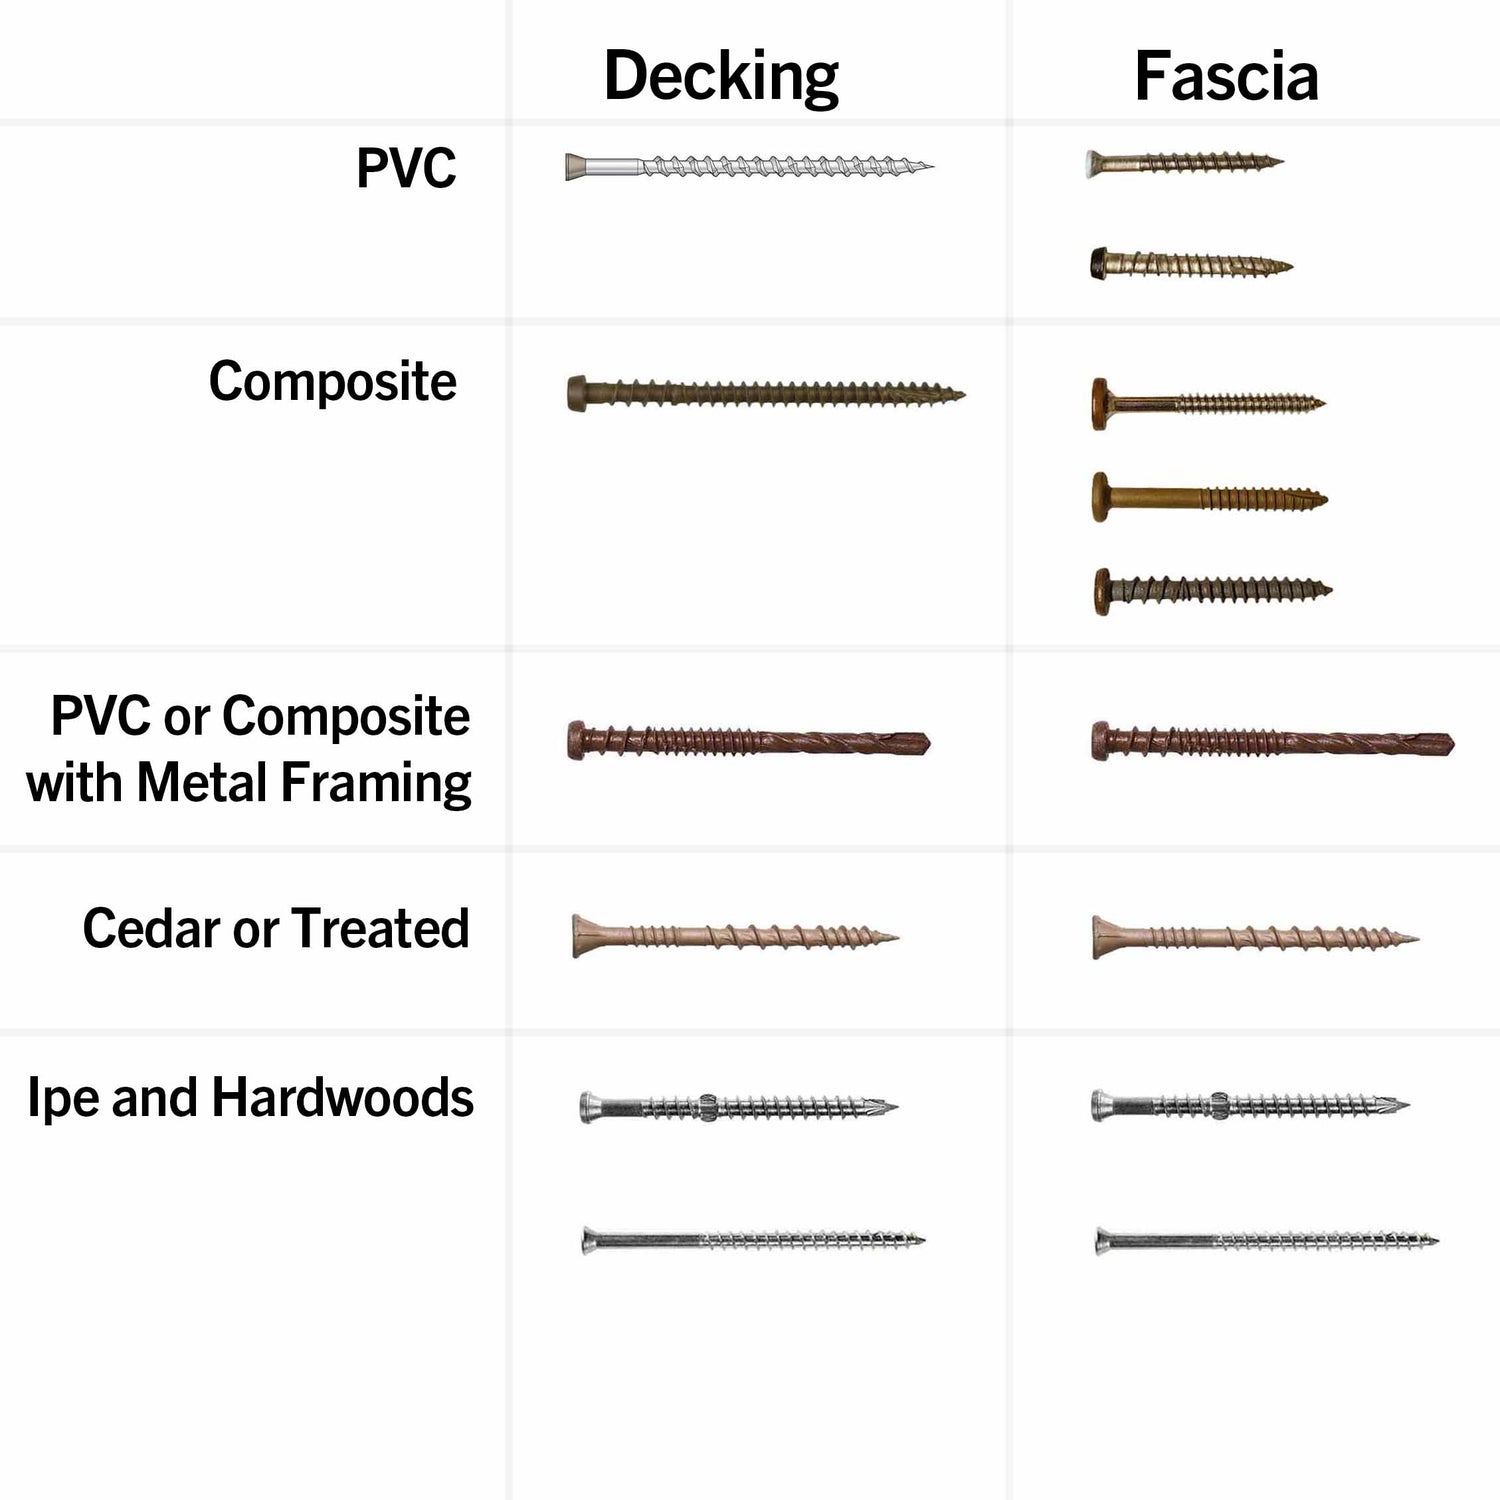
Construction
Fasteners
Low-maintenance decking needs special screws for a clean, finished appearance. Fascia requires unique screws depending on the material to secure the thinner fascia or riser boards. Grooved decking fasteners are not all universal, choose according to the decking brand you're using.